Moving Audio Clips in CapCut: A Step-by-Step Guide
Incorporating audio into video editing can improve the overall quality and impact of the video. By using a range of audio effects, users can adjust the frequency range of various audio clips, blending them seamlessly with your visuals to create a more enjoyable video viewing experience. In addition, these effects can enhance its immersive quality. In this article, we'll briefly introduce how to use Capcut's editing feature to create videos that your audience will enjoy.
- Author: Augenstern
- Update: Oct 31, 2024

What is Capcut?
CapCut is a free video editing application developed by ByteDance, the same company behind TikTok. Since its launch in April 2020, it has rapidly gained traction among users for its accessibility and user-friendly features, making it particularly appealing to beginners in video and audio editing. The app provides an intuitive interface that allows users to effortlessly edit and enhance videos, audio tracks, or podcasts. It is designed for a wide range of content creators, including those producing material for social media platforms like TikTok, Instagram Reels, and YouTube.
Key Features of CapCut
Multi-Platform Availability: CapCut can be downloaded as a mobile app from the App Store and Google Play for iOS and Android devices. Additionally, users can access a desktop version for Windows and Mac, allowing for versatile editing options across different devices.
Comprehensive Editing Tools: The app offers a variety of editing features such as trimming, splitting clips, adding transitions, and applying effects. Users can also incorporate text overlays and auto-captions to enhance their videos.
Audio Editing Capabilities: CapCut includes robust audio editing tools that allow users to import audio files, remove background noise, adjust volume levels, and add sound effects. Features like speech-to-text and vocal extraction further enhance the audio experience.
AI-Powered Features: The platform utilizes artificial intelligence to automate tasks such as generating captions and enhancing video quality through upscaling and motion tracking.
Rich Music Library: CapCut provides access to an extensive library of background music and sound effects that can be easily integrated into video projects.
User Experience
CapCut's design focuses on simplicity, making it easy for both novice and experienced creators to navigate the editing process. The application saves project drafts automatically, allowing users to pause and resume their work without losing progress. Moreover, the synchronization feature enables seamless transitions between mobile and desktop versions of the app.
Pricing Structure
CapCut is free to use with essential editing tools available at no cost. For those seeking additional features and premium assets, a subscription to CapCut Pro is available for $7.99 per month. This plan unlocks a wider array of resources including animations, advanced effects, and exclusive soundtracks.
Step by Step to Move Audio in CapCut
Opening the Project
Launch the CapCut app.
After you download and install CapCut, launch the app on your device and start editing.
Tap the “+” icon to create a new project.
To begin a new project or import a video file, simply click on the “New Project” button in the interface. From there, you can select the video file you wish to edit and import it onto the platform. Additionally, CapCut allows you to choose from various aspect ratios tailored to different platforms, such as creating videos specifically for TikTok, Instagram, and more.
Adding Audio
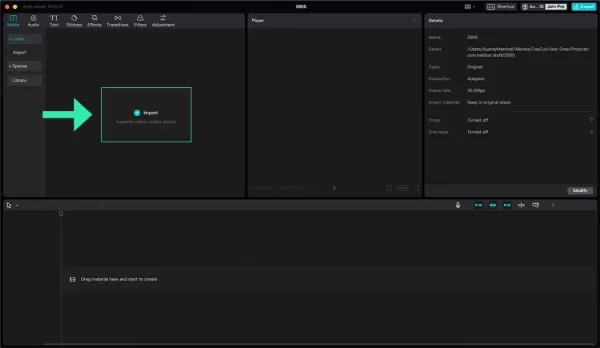
Adding an audio file in CapCut is a straightforward process. To do so, simply click on the “Import” tab within the interface, select the audio file you wish to use from your device, and transfer it into CapCut. Additionally, you can add both video and audio files simultaneously through the same tab, streamlining your editing workflow.
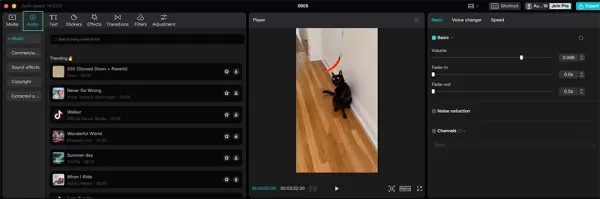
You can also choose to select audio files directly from CapCut’s library by clicking on the “Audio” tab. Once there, simply drag the desired audio file onto the video editing timeline, and you’re all set!
Moving the Audio
Tap on the audio clip on the timeline.
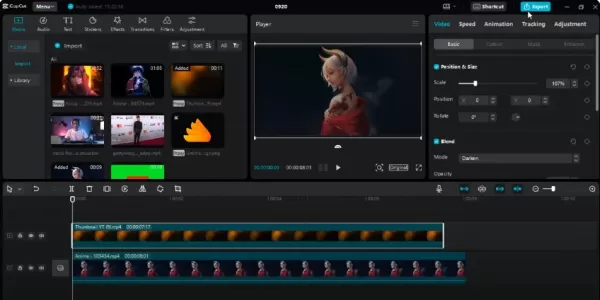
After importing your audio file and dragging it onto the video editor, it will appear as a waveform on the timeline. You can then edit the sound clip directly within the same timeline, allowing for precise adjustments alongside your video.
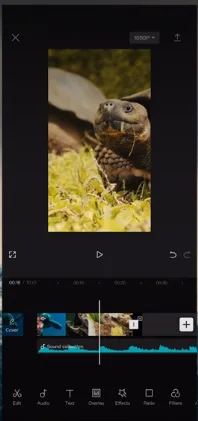
Long-press and hold the audio clip.
Ensure that the video editing options, such as Edit, Audio, Text, and others, are visible on the interface. Then, simply tap and hold on the audio clip to move the waveform to your desired position within the timeline.
Fine-Tuning the Audio
Tap On The Audio Clip To Reveal Editing Options
One of the best things about CapCut is the fact that it offers a comprehensive array of video editing options you can use to add a variety of visually appealing effects and transformations to make your video look more attractive and profound. To access these editing tools, just click on the audio clip and a panel of options will open below it, revealing different editing options.
Using these options you can conduct a variety of audio editing processes, such as:
Trimming the Beginning And End of the Audio Clip
This is an easy way to shorten the audio clip or eliminate any unwanted sounds from your video. Once you import your chosen audio file into the editing timeline, you can move the waveform in either direction, as illustrated in the image below.
Using the white vertical line, you can adjust the position of the audio bar by moving it backward or forward. To crop any section of the audio, simply click on the square icon located on the option bar above the vertical line, as shown in the image.

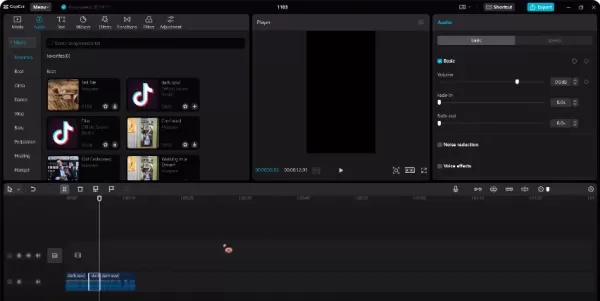
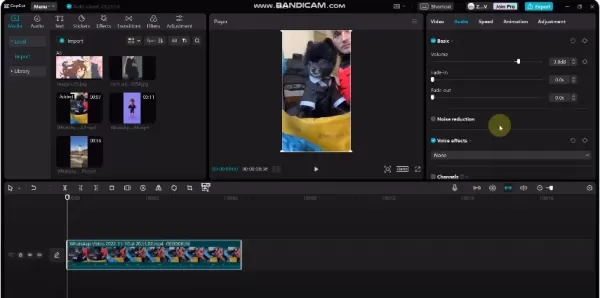
Adjusting the Volume
Adjusting the volume of your audio clip is straightforward. Just click on the audio clip you are editing, and a new box will appear in the top right corner of the screen. This box will display various audio options, including volume control, fade-in, fade-out, noise reduction, and more.
Add Fade-In and Fade-Out Effects
Audio fades are commonly used to create smooth transitions between audio clips, enhancing the overall immersion of your video. The fade-in option begins the audio in silence and gradually increases the volume as the video progresses. Conversely, fade-outs start with full volume and gradually decrease to silence towards the end. You can easily adjust both settings in CapCut by following the steps outlined above.
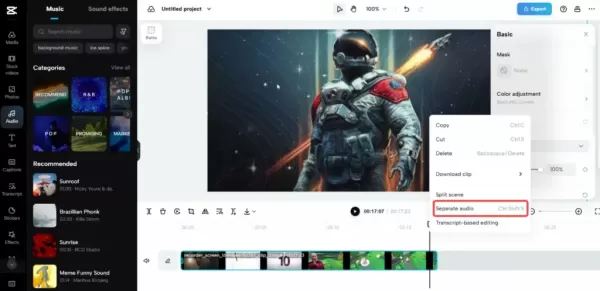
Split the Audio Clip into Multiple Parts
Another impressive feature of CapCut is the ability to split your audio clip into multiple segments throughout the timeline while editing your video. After dragging your audio clip onto the timeline, right-click on it and select “Separate Audio” from the drop-down menu. This action will instantly divide your audio into different sections, allowing you to choose specific parts of the clip that you want to split further.
Saving the Project
Here’s how to save your project on your device.
Tap on the “Export” Button.
Once you’ve finished editing your video, you can save your project by clicking on the “Export” tab located in the top right corner of the screen.
Choose the Desired Video Resolution and Frame Rate
Once you click “Export,” a new menu will open, allowing you to finalize your project. In this menu, you can modify the video resolution and frame rate, rename your project, choose the destination folder for saving the file, and change the format of the audio or video file, among other options.

Tap on “Export” to Save the Edited Video with the Moved Audio
Finally, once you’ve completed all the final adjustments, simply click on the “Export” button at the bottom of the menu to save the video with the audio you’ve just added.
Additional Tips
You Can Move Multiple Audio Clips At The Same Time
Another intriguing feature of CapCut is the ability to move and edit multiple audio clips simultaneously within your video. To do this, select the audio clip you want to edit on the timeline. Then, click on “Import,” and while holding the Ctrl key, select various audio files from your device to import them into the platform. Alternatively, you can click on “Audio” to choose multiple audio files directly from CapCut’s library.
You Can Use Keyframes To Create Precise Audio Transitions
You can also utilize keyframes in CapCut to create sharp and immersive transitions in your video, allowing you to modify various elements on the timeline for greater impact. For instance, to add a zoom effect, select the video clip in the timeline and click on the keyframe button, which resembles a diamond. Then, choose your desired zoom level and make any necessary adjustments, such as cropping or resizing the video.
What kind of Music you can choose on CapCut?
CapCut provides users with a diverse range of music options to elevate their video content. Users can access the extensive CapCut music library, which includes a variety of music tracks suitable for different genres and moods. Additionally, the app allows users to upload their own music, giving them the creative freedom to personalize their projects. Here’s a brief breakdown of how to add music to CapCut.
How to Add Music in CapCut?
Here’s a concise guide on how to incorporate music into your videos using CapCut:
Access the Music Library: Open the app and navigate to the 'Music' tab. Here, you will find a diverse selection of audio tracks that can elevate your video’s engagement.
Select a Track: Browse through the library or use the search function to find a specific song that fits your video’s theme.
Add Music to Timeline: Once you’ve selected a track, simply drag it onto your timeline where your video clips are located. This allows you to synchronize the music with your visuals seamlessly.
Upload Custom Music: If you prefer to use your own music, click on the 'Import' button within the 'Music' tab. Select the audio file from your device, and it will be added to your project.
Edit Music: After adding music, you can trim it, adjust volume levels, and apply fade-in or fade-out effects to ensure it complements your video perfectly.
By utilizing CapCut's robust music options, users can significantly enhance their video content, making it more engaging and emotionally resonant for viewers.
Why we introduce Capcut and use it?
CapCut has emerged as a leading video editing app in recent times, boasting an impressive user base of around 200 million active users globally each month. Developed by ByteDance, the same company behind TikTok, CapCut is recognized for its flexibility and ease of use, making it an attractive option for both novice and experienced creators.
Here’s why it has become the go-to choice for many:
Free Access for All
One of CapCut's standout features is that it is completely free to use. This accessibility allows anyone, regardless of their location or financial situation, to create high-quality videos without encountering subscription fees or hidden costs. Unlike many other video editing tools that impose financial barriers, CapCut prioritizes user accessibility, offering a comprehensive suite of editing tools without charge.
User-Friendly Interface
CapCut distinguishes itself with a simple yet intuitive interface that requires little to no learning curve. While many editing platforms offer similar features, CapCut combines them in a way that encourages creativity and flexibility. Notably, its multi-layer editing capability allows users to overlay images, videos, and text seamlessly, enabling the creation of dynamic compositions. This ease of use fosters a creative environment that appeals to a wide range of users.
Advanced Editing Tools
CapCut integrates a variety of advanced features that enhance the editing experience. Some key offerings include:
AI-Powered Tools: Features like auto captions, background removal, and video upscaling streamline the editing process and improve video quality.
Multi-Platform Support: Users can edit on desktop or mobile devices, providing flexibility for different editing needs.
Rich Effects and Transitions: The app includes numerous video effects, filters, and transitions that can be easily applied to enhance visual storytelling.
Community and Collaboration
CapCut also supports collaborative projects through cloud storage, allowing users to share their work with others easily. This feature is particularly beneficial for teams working on joint projects or seeking feedback from peers.
CapCut provides a robust suite of editing tools designed to enhance the video editing experience, making it both flexible and user-friendly. Here are some of the key features that contribute to its popularity among users:
Video Trimming and Splitting
CapCut allows precise cutting and splitting of videos, which is ideal for removing unwanted sections or creating smooth transitions between clips. Users can easily select the portion of the video they want to trim or split, ensuring that their final product is clean and polished.
Multi-Layer Editing
The platform's multi-layer editing feature enables users to overlay text, audio, and video files effortlessly. This capability allows for the creation of complex and visually appealing compositions, giving users the tools they need to craft engaging videos.
Variety of Effects and Video Filters
CapCut offers an extensive array of video templates, effects, and filters that can be easily modified to suit individual preferences. Users can choose from various color grading options, styles, and creative effects to enhance the visual quality of their videos. This flexibility allows for a high degree of customization, enabling creators to optimize their content for different audiences and platforms.With these powerful editing tools at their disposal, users can create beautiful and impactful videos with ease. Now, let's delve into how users can move audio within CapCut to further enhance their projects.