How to use YouTube's AI Auto Dubbing?
While 70% of YouTube’s top videos are in English, demand for non-English content grows. Expanding reach via multilingual content is easy but manually complex/time-consuming.YouTube’s new AI auto-dubbing simplifies this, building on its multi-language tool. It auto-generates audio in 8 languages: Spanish, Portuguese, German, French, Italian, Hindi, Indonesian, Japanese.But the tool has limits. Let’s explore how it works and whether alternatives suit your needs.
- Author: Shine
- Update: May 21, 2025

What is YouTube's AI Auto Dubbing

Video-sharing platform for watching, sharing, and creating content.
YouTube’s AI auto-dubbing is a feature that automatically translates a video’s audio into multiple languages, generating a synthesized audio track. When enabled, viewers can select their preferred language directly from the video’s settings menu.
Even for English-proficient viewers, many may prefer consuming content in their native language. AI dubbing offers a quick, low-effort way to expand global reach without extensive manual work.
Unlike subtitles, AI dubbing provides a more immersive experience via fully translated audio. However, as an automated process, issues like inaccurate translations or audio mismatches may occur.
Important Note: Auto-dubbing rolled out in December 2024 and continues in 2025, but isn’t available on all accounts yet. As of April 2025, it’s accessible to all creators in the YouTube Partner Programme (YPP), though non-partner creators still lack access.
How to Turn Off Auto Dubbing
While YouTube automates the dubbing process, you can control whether the feature is enabled on your account.
Step 1) Log into YouTube Studio
Step 2) Go to Settings > Upload Defaults > Advanced Settings.
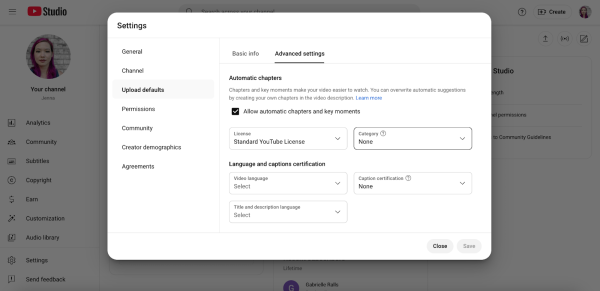
Step 3) Check the Allow Automatic Dubbing box.
If the box is missing, the feature hasn’t been rolled out to your account yet. As a new addition, YouTube is gradually introducing it, starting with YPP members. This feature is linked to YouTube’s multi-language audio tracks feature, which you can explore as an alternative.
In a YouTube update dated April 22, 2025, the company confirmed that all YPP creators now have access to auto-dubbing, though a timeline for broader availability wasn’t provided.
In a video update, a senior Google employee stated:
“We’re excited to announce that all YPP creators now have early access to auto-dubbing and can opt in via YouTube Studio. We’re working to expand auto-dubbing to more creators in the future, so stay tuned.”
Users can qualify for the YPP by gaining 1,000 subscribers plus either 4,000 valid public watch hours in the past 12 months or 10 million valid public Shorts views in the past 90 days.
How YouTube's Dubbing Feature Works
YouTube's new AI dubbing feature operates automatically, but it’s useful to understand the behind-the-scenes process once you’ve enabled AI auto-dubbing:
Video Upload by Creator:
Upload your video to YouTube as usual. The platform processes the content and readies it for potential dubbing. Clear audio improves dubbing accuracy, so using a Remove Background Noise tool beforehand is recommended.
Language Detection:
YouTube’s AI analyzes the video’s original language to check compatibility. The feature currently supports a limited set of languages:
If your video is in English, it will be translated into the other eight supported languages (Spanish, Portuguese, German, French, Italian, Hindi, Indonesian, Japanese).
If your video is in one of the other seven non-English supported languages, it will be translated into English.
Translation Process:
The AI uses advanced natural language processing (NLP) algorithms to translate the original audio into target languages. This process starts with generating a text script from the audio.
Voice Synthesis:
The translated text is converted into speech via AI-powered voice synthesis. While the resulting audio may sound less natural than human narration or voice cloning, the technology is evolving to improve realism.
User Experience:
YouTube integrates the synthesized audio tracks into the video, allowing viewers to select their preferred language from the settings menu during playback.
How to Dub Videos with Kapwing
Step 1) Upload Your Video
Upload a video to The Editor. You can upload content in any resolution or aspect ratio.
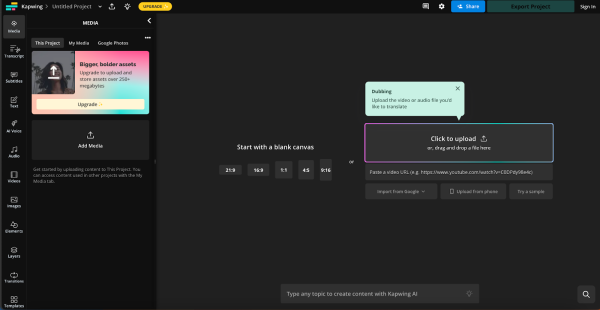
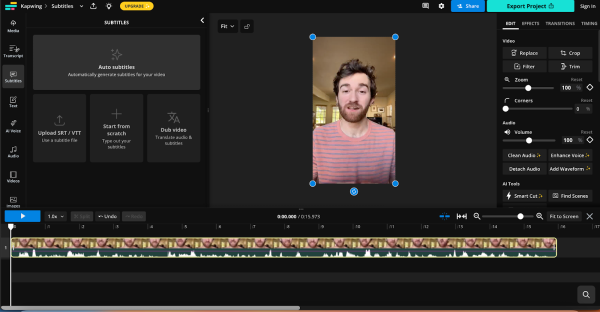
Your video will appear in the video editor.
Step 2) Select “Dub Video”
In the left side panel, under “Subtitles,” you’ll see the option to “Dub video.”
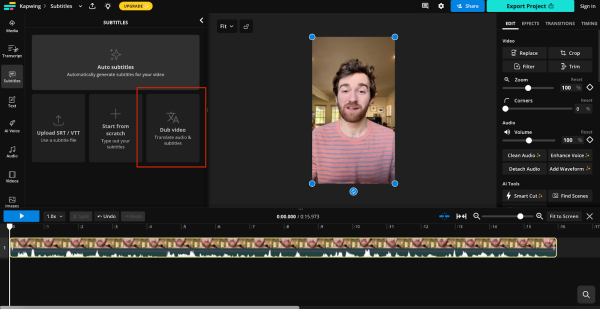
Click on “Dub video” and you’ll be brought to the video dubbing tool.

Step 3) Set Your Options
In the panel, you’ll find several dubbing settings:
Original language: Select the video’s original language from over 37 languages and dozens of dialects.
Translate to: Choose the target language for translation.
Advanced settings:
Allow adjustments to video speed: Different languages may require varying timing for the same content. Enable this to let Kapwing adjust video speed for better dubbing sync.
Audio: Opt to clone the voice for future reuse or select from a diverse stock library with voices varying in style, accent, and pace.
Number of speakers: Manually set the number of speakers or enable auto-detection.
Brand glossary: Add terms the translation system may not recognize (e.g., brand names) to a Brand Kit.
Step 4) Click Dub
After configuring your settings, you’ll see a button labeled either Dub video or Dub with cloned voices. Click the button to proceed.
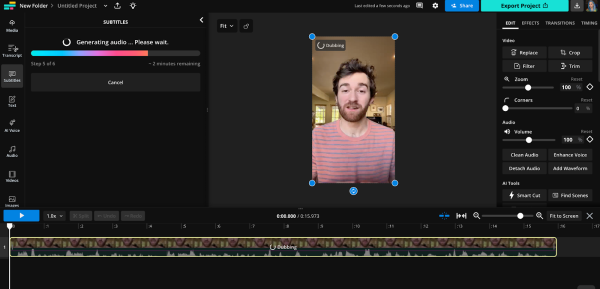
The online dubbing tool produces not only a dub but also a text translation of your video.
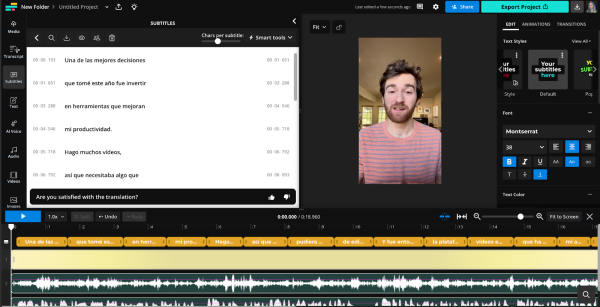
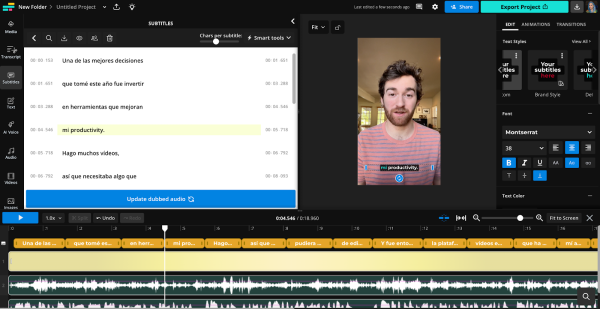
Step 5) Edit and Enhance Your Dub
Once the dub is generated, you can edit the transcript by making in-line text adjustments. If you modify the text, a button labeled Update dubbed audio will appear—click it to refresh the dubbed audio with your changes.
Step 6) Export Your Video or Audio
You have two options for sharing your new AI dub on YouTube:
If you altered lip-syncing or video speed:
If you modified the video’s visuals (e.g., adjusted duration or added lip-syncing), you’ll need to upload the full video file.
If you didn’t change video speed:
You can simply upload the dubbed audio track.
In either case, your next step is to export your project:
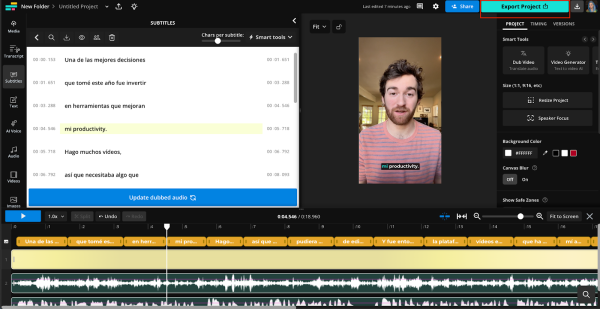
When you click “Export Project,” you’ll get the following options:
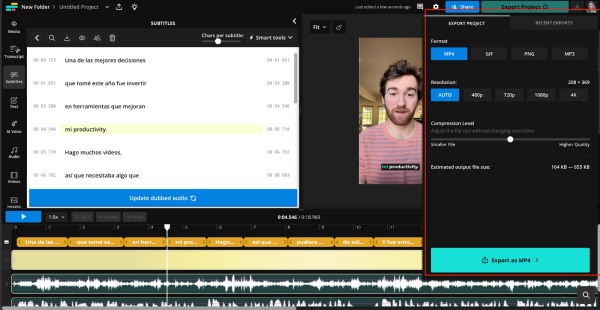
For YouTube, you can export the file as MP4 (video) or MP3 (audio). You can also select the resolution: Auto, 480p, 720p, 1080p, or 4K. Generally, for YouTube, a higher resolution is preferable for better quality.
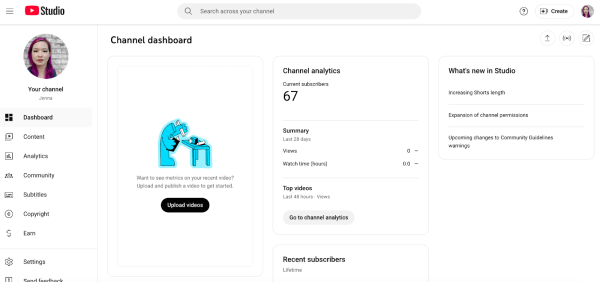
Step 7) Upload Your Dubbed Video or Audio to YouTube
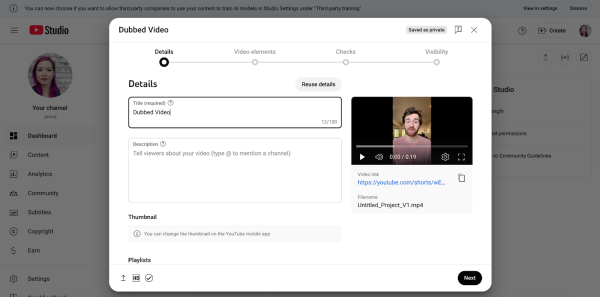
Return to your YouTube Dashboard.
If you’re uploading a fully dubbed video, simply upload it as you normally would. YouTube will automatically detect the video’s language.
If you’re uploading only the audio for a video, go to the video you want to add the dubbing to and click Subtitles.
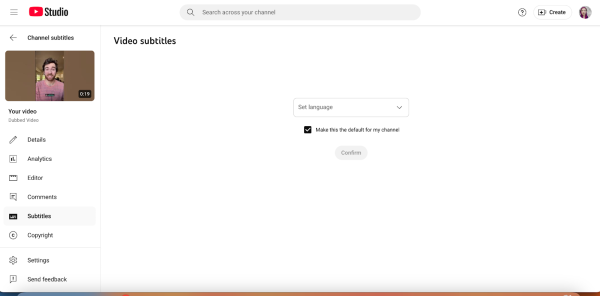
Here, you can upload your multi-language audio track. However, the option may not be available to you yet. If you don’t see it, it’s because this feature hasn’t been rolled out to your account.