How to Use the Instagram Green Screen Effect?
In this article, we will explain all the key information regarding Instagram's green screen effect. Additionally, I'll detail the process of replacing a video background using Kapwing.
- Author: Shine
- Update: May 10, 2025

Explore Instagram’s Green Screen Effects
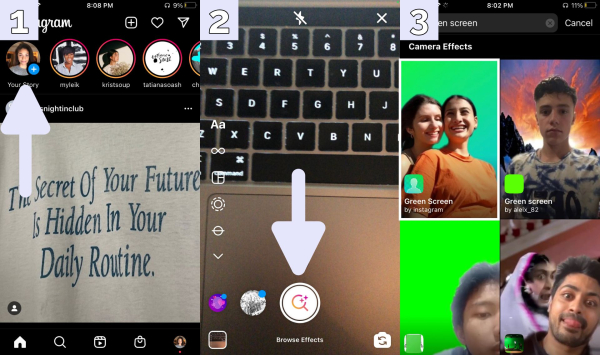
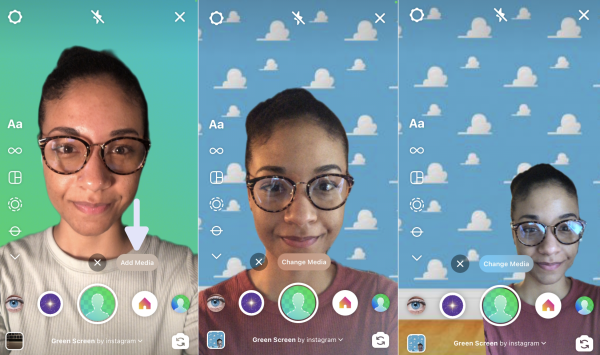
1.Launch Instagram on your mobile phone. Next, tap on your profile picture situated in the top - left corner of the screen.
2.Select “story,” then scroll all the way to the right and click on “browse effects.” Alternatively, you can tap “reels” followed by “effects” on the left side of the screen. Scroll rightward until you spot “browse effects.”
3.Hit the search icon and enter “green screen.” Multiple camera effects will show up, but we’re looking for the one developed by Instagram. Tap the first option and add it to your favorites to save it among your camera effects.
Now comes the exciting part! Let's give this effect a try and explore just how creative you can get as a first - time user. Go back to the story page and tap on the circle representing the green screen effect. If you're working with Reels, tap "effects" first, and then the green screen icon. When you use the front - facing camera, you'll see yourself on the screen with a green background.
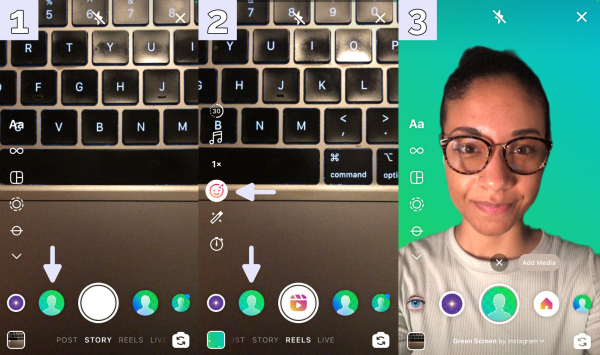
Tap “add media” to replace the green screen with an attention - grabbing background. Upload a photo or a video, then use a pinch gesture and drag your image to adjust your position on the screen. This feature is ideal for creating content where media helps tell the story most effectively.
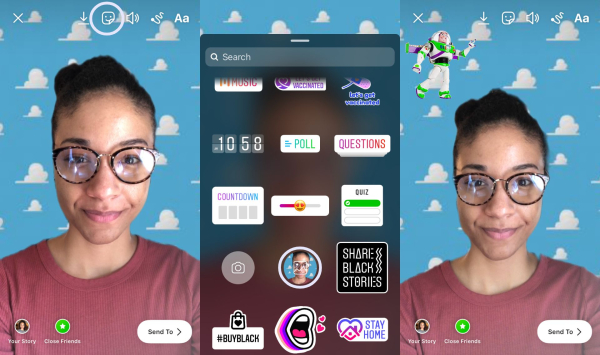
Start with something straightforward, like a photo, to get familiar with the feature. Upload an old family photo to evoke a sense of nostalgia, or add an image from your favorite TV show or video game. I’ve chosen a Toy Story - themed virtual background! Keep in mind that if you upload a video, its audio won't be included.
After recording your Story or Reel, you can search for GIFs and overlays by tapping the sticker icon. The camera roll sticker allows you to upload extra photos from your gallery, yet you are unable to overlay videos or GIFs. I suggest using the text tool to add captions to your post as a final step. This way, a wider audience can access and understand your content.
How to Remove Instagram Background in Kapwing
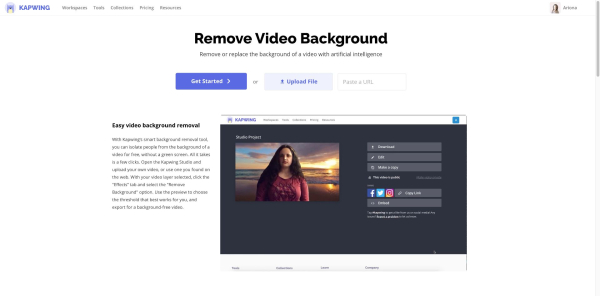
In general, the green screen effect is user - friendly and enables users to showcase their creativity by incorporating various elements into the background. However, if you desire a tool with more advanced features, such as the ability to include audio and overlay videos and GIFs, consider using Kapwing's remove background tool. Kapwing is an online video editor that can be used for free on any device. The most appealing aspect is that you can achieve the same effect without the need for an actual green screen!
Step One: Upload a Video
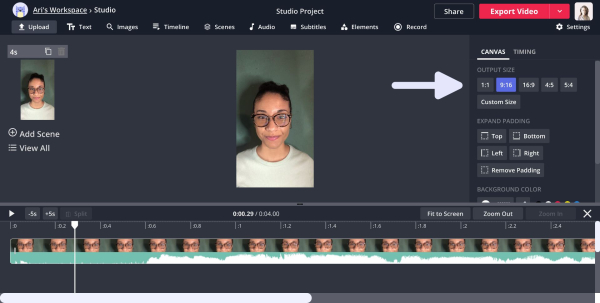
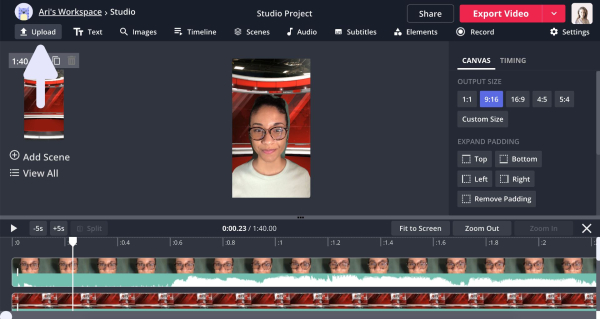
Go to Kapwing, click on “tools,” and choose “remove video background.” Then, you can either upload a video file from your device or paste a video URL. While I suggest using a PC for this tutorial, you can also use an iPhone, an Android device, or a tablet. Kapwing is compatible with major video formats like MP4, MOV, 3PG, and others. Ensure that the output video has an aspect ratio of 9:16, which will make it the right size for Instagram.
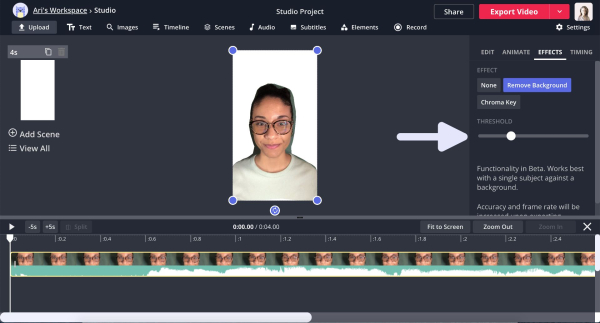
Step Two: Remove the Background
Click on your video to select it. Next, click on “effects” and then “remove background.” Drag the circle to modify the threshold and observe as the background vanishes. Additionally, you can click on “chroma key” to isolate and remove a specific color channel. Select “blue,” “green,” or “key to color,” and use the eyedropper tool to pick a color. After that, you have the option to adjust the hue, saturation, and brightness thresholds.
Step Three: Upload a Background
Click “upload” or paste a link to insert a new background. Alternatively, you can click “image search” to browse through ideas from Google. I’m uploading a virtual studio background sourced from YouTube to channel my inner news anchor persona. Here are some suggestions to inspire you:
The iconic living room from a classic TV show
An office space that aligns with your personal aesthetic
A renowned painting
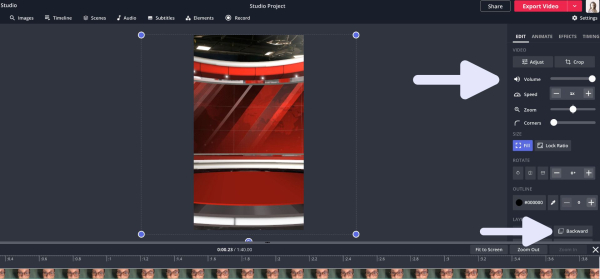
Your newly added layer will show up in the timeline. You can resize it by dragging its corners and crop it using the crop tool. Once the layer is selected, click “backward” to position it behind the original video. To balance the audio, you can adjust the volume of each video. Alternatively, you can right - click on a layer and select “detach audio” to remove the audio from it entirely.
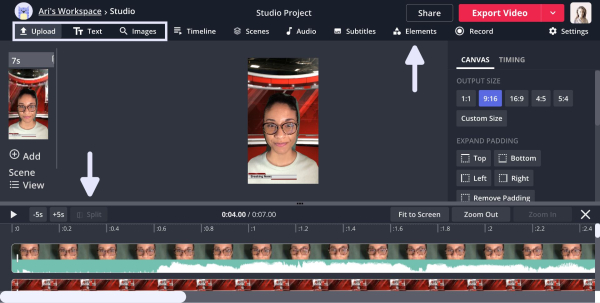
Enhance and personalize your video by incorporating GIFs, videos, images, emojis, and other elements until you achieve the desired outcome. I included a lower - third graphic to mimic a news channel's style and added a breaking news sound effect sourced from YouTube. Rearrange each layer to its ideal position on the timeline and adjust the length by dragging the endpoints. Additionally, utilize the split tool to divide a video into segments and remove unwanted parts from the middle.
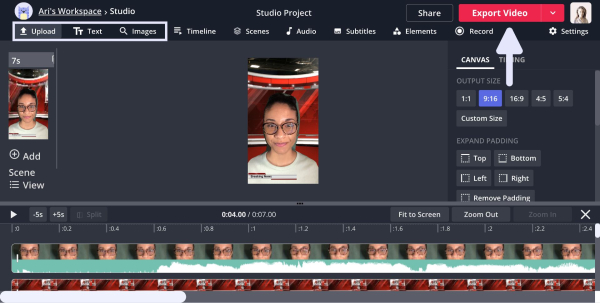
Step Four: Export and Download
Preview your video several times to ensure it looks perfect. Once satisfied, click the "export video" button located in the top - right corner of the editing studio to start the processing. After the video is ready, you can either click "download" directly or sign up for a free Kapwing account to remove the watermark before downloading.
Unleash your creativity to the fullest. If you have any topic suggestions, don't hesitate to contact us on social media. Check out YouTube and TikTok for the latest, fashionable tutorials. And make sure to follow us on Twitter to keep abreast of all the news and updates about Kapwing.