How to make clothes on roblox?
Create a unique Roblox character using Pixlr's intuitive Clothes Maker. Utilize our easy templates and customization tools to design striking clothing for your avatar.Pixlr offers a wide range of templates, helping you find the perfect design that fits your style. With our customization options, you can make your creations truly one-of-a-kind.
- Author: Shine
- Update: Dec 24, 2024

Create Roblox Account & Obtain Robux
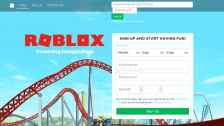
To begin, you’ll need a Roblox account and some Robux.For those who may not know, Robux is the currency used in Roblox. It allows you to purchase clothing, hats, and accessories for your character, as well as games and in-game items. You can acquire Robux by purchasing it with real money or by earning it through gameplay. In short, if you want to buy something on Roblox, you need Robux!Kids don’t require a large amount of Robux to get started, but having at least 10 Robux is recommended for uploading to servers. More details on this will follow, but it's good to keep in mind as you start!
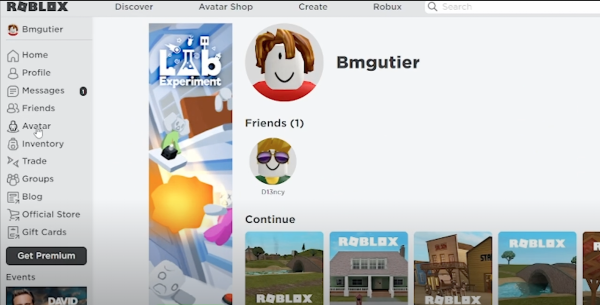
First, log into your Roblox account and click on “Avatar” in the left-hand menu. This section allows you to create your own Roblox avatar and access the “Create” template needed to make the file you’re looking for.
Navigate to “Create a Shirt” Screen
Next, click on “Clothing” in the top row, and then select “Shirts” to access the template. On the right-hand side, you’ll see a button labeled “Create.” Click that button to open the option to “Create a Shirt.”

Select between a Standard Shirt and a T-Shirt.
Before we proceed, let’s discuss the different types of shirts available in Roblox. You can choose between two options:
T-Shirts: These can only feature an image with a solid color background, which limits the creative possibilities for kids.

Download a Template
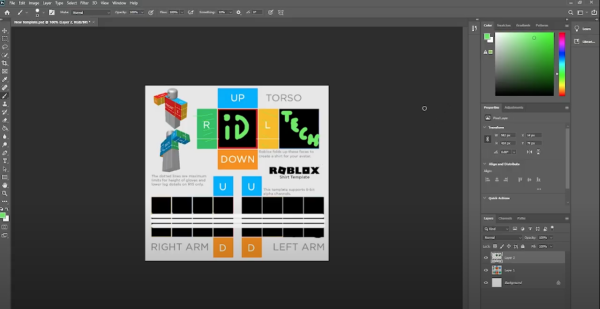
On the “Create a Shirt” screen, you’ll see a message that says, “Do you see the template? If not, download it here.” Click on “download it here” to access the Roblox shirt template image displayed below.At first glance, this may seem a bit confusing, so let’s break it down!

First, the various colors—green, red, yellow, orange, blue, etc.—represent different parts of the Roblox character's body. For instance, the front of the torso is marked in red, while “up” indicates the top or shoulder area.
The left and right sections correspond to the inner parts of the torso, and the back represents the rear.
The bottom section is less visible unless the Roblox character is running or moving.In the lower half of the template, you'll find additional T-shapes for both the right and left arms, which also follow the same color scheme: red for the front, and so on.
To download and update the template, you can use Photoshop. Simply right-click on the image, select “Save image as,” and choose a location to save it.
Next, open Photoshop and the downloaded file, then modify the template to your heart's content.
Your shirt design can take many forms, such as a tuxedo, business suit, blouse, winter coat, or something entirely different!To save your work, go to “File” and then select “Save.”
Upload Updated File to Roblox
To upload your file back into Roblox, return to the website and find the green “Upload for 10 Robux” button. Don’t click it just yet; simply ensure you’re on the screen where this option is visible.(As a side note, 10 Robux isn’t a significant amount—it roughly translates to about $0.13!)
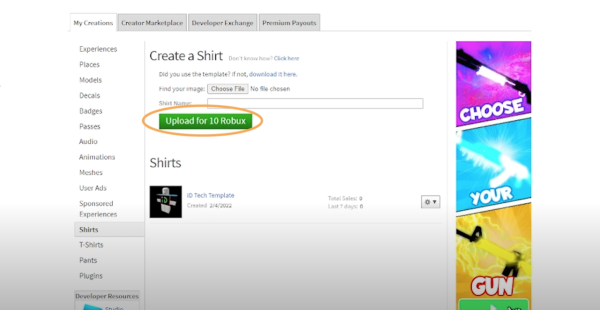
Next, click “Choose File” and select the template you just created and saved. In the “Shirt Name” field, you can name the shirt whatever you like.When you’re ready, click the “Upload” button, and then confirm by selecting “Would you like to upload your shirt for 10 Robux?”Once the upload is complete, you’ll see an icon and the name of your shirt listed under “Shirts.” The shirt image will appear as a piece of paper with a dotted outline, indicating that it is currently under review by Roblox to ensure it meets their guidelines. This review process may take a few hours for approval.
See Your Shirt in Real Time
To begin, kids can open Roblox Studio by clicking “Create” in the top navigation bar. Then, they should select “Start Creating” and choose “Baseplate” to access a blank screen. Once the page loads, navigate to “PLUGINS” in the main menu.
Next, click on “Build Rig,” which will insert a dummy character for testing clothing as if someone were actually playing. They can choose either “R15” or “R6,” depending on the model type they prefer.
For now, let’s select “R15” and then “Block Rig.”Now that the dummy Roblox character is displayed on the screen, kids should click the plus sign next to “Dummy” in the explorer window.
Here, they can find “Clothing,” and in the left-hand “Inventory,” they can right-click on the shirt, select “Copy Asset ID,” and paste the ID next to “ShirtTemplate” in the “Appearance” section. Once they press “Enter,” the shirt will appear on their Roblox dummy model.

The purpose of this process is for kids to preview how their shirt looks before they decide to monetize it. If they plan to share a product with others, they’ll want to ensure it’s ready for a wider audience.
Next, let’s return to the Roblox website and select “Avatar.” Kids should click on “Clothing” and then “Shirts” to find the shirt they created—just click on it. If the shirt design isn’t visible yet, it’s likely still in the processing and approval stage.Once the shirt has been approved, go to your shirts and click the down arrow next to the gear icon.
You’ll see options for "Configure" and "Advertise"—click on “Configure.” This will take you to the “General” tab, where you can verify that the shirt your child wants to monetize is indeed the correct one.After confirming, click on “Sales” under the “General” tab, which will bring up the “Configure Shirt” screen. On the right side of the “Items for Sale” line, you’ll see a toggle button.
Click this toggle, which will turn green and open a pricing screen. Once your child decides on a selling price for their shirt, enter the amount.

As a tip, it's important for your child to set a reasonable price for their shirt. Pricing it too high may discourage buyers, while pricing it too low could mean missing out on potential earnings.
A good guideline is to start selling shirts for around 6 or 7 Robux. Keep in mind that Roblox takes a small percentage of each sale, and the minimum price you can set is 5 Robux.After clicking “Save,” if everything goes well, you should see a green bar that says “Successfully updated,” which is excellent!
At this point, the shirt is ready for others to purchase and download.That’s it!To recap, we’ve discussed how to create shirts in Roblox, upload those designs, and monetize them! If your child needs help or wants to take the next step, consider our Online Private Lessons featuring Roblox, Lua, and more!