How to Make a Facebook Profile Picture Frame?
Customize your Facebook profile photo by creating your own picture frame. In this tutorial, I’ll demonstrate how to create a transparent frame or use pre-made frames.
- Author: Shine
- Update: Jun 04, 2025

Step one: Create a Transparent Canvas
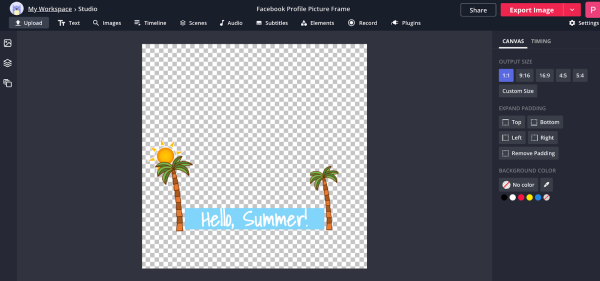
When you enter the Kapwing Studio, the canvas size will default to 1:1, which is the recommended aspect ratio for a Facebook profile picture. Next, scroll down to Background Color in the right-hand panel. To make the background transparent, select No Color (represented by white and grey checkerboard squares with a red line through it).

Step Two: Customize Your Frame with Text, Images, and Emojis
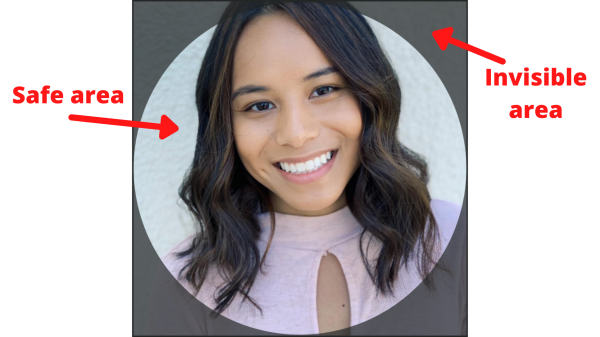
Now it’s time to personalize your frame. Before you begin, ensure your design fits within the profile picture safe area (avoid the greyed-out "invisible" area). You can create a circle on the transparent canvas as a guideline, design within the circle, and delete it once you’re done.
Kapwing has many popular tools such as text, images, and elements. I recommend using transparent icons and images since we will be exporting the entire image as a png. You could use transparent png images in your picture frame by putting “png” or “transparent” at the end of your search keyword.
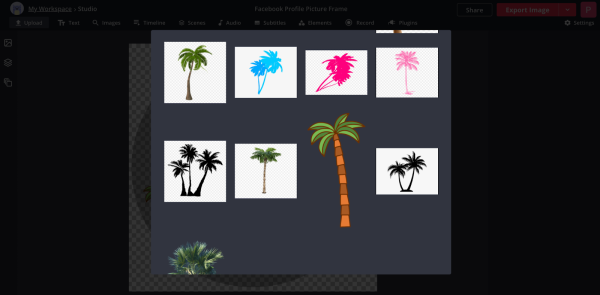
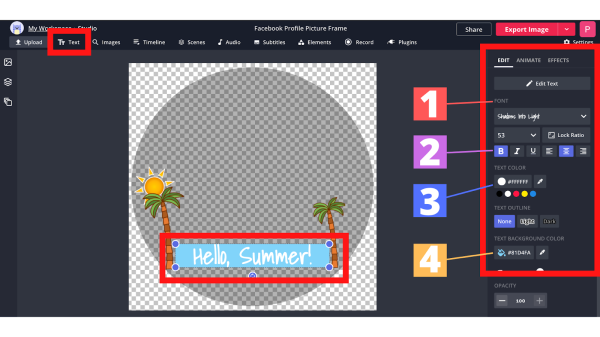
Once you have found some images that you’d like to use, resize them so that they are placed within the safe areas. Next, we’re going to add some text to our photo. On the right-hand side panel, there are a few text options that you can use. 1) Choose a font style, 2) Bold, italicize, or underline the text, 3) Change the text color, and 4) Choose a background color. When you’re finished customizing the Facebook profile picture frame, delete the circle on the canvas if you created one.
Step three: Export and Upload Your Custom Frame to Facebook
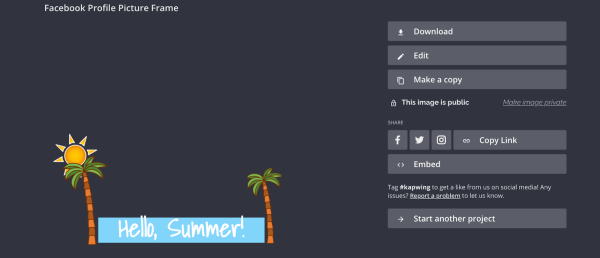
Click Export Image in the top-right corner and wait to be redirected to the download page. On this page, preview your image to ensure it is transparent (i.e., no solid background—look for the white and grey checkerboard pattern). If the background is not transparent, click Edit, then change the background color to No Color / Transparent. Once confirmed, select Download to save the image to your device.
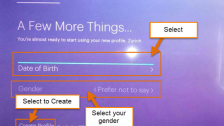
Next, we’re going to upload the frame to Facebook. Go to https://developers.facebook.com/products/frame-studio/ and select Create a frame. On the next screen, you will be able to upload your frame. Make sure you adjust the size and it looks correct in the preview.
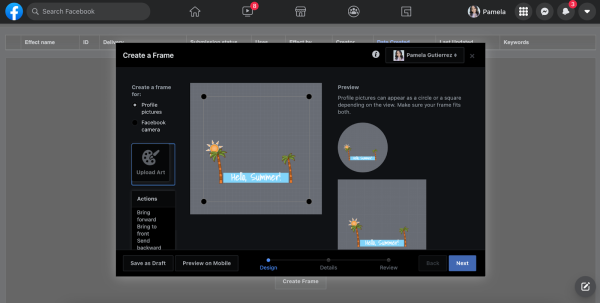
Click Next and enter some details about your picture frame, such as its name. You can also add optional information like location, schedule, and keywords. After filling in all the details, click Publish.
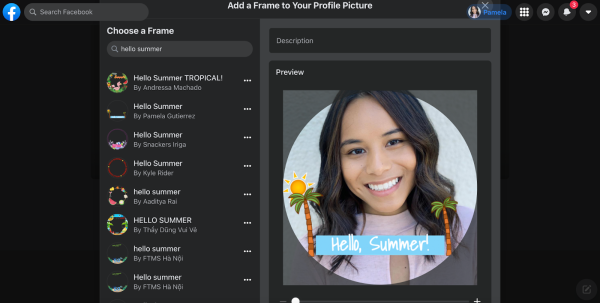
To use your frame, go to your profile picture and select the camera button, then choose the Frames tab. In the left-hand panel, search for your frame (mine is named “Hello Summer”), scroll through the results until you find it, select the frame, and click Use as a profile picture.
Step Four: How to Access Pre-made Profile Picture Frames
To use a pre-made Facebook profile picture frame:
Go to your profile picture and click the camera button.
Select the Frames tab.
In the Frames tab, search for specific frames or choose from suggested frames.
Select a frame you like and click Use as a profile picture.

I hope this tutorial helped you create some fun Facebook profile picture frames. If you decide to create more, tag us @KapwingApp on social media - we’d love to see what you end up making. For more written tutorials like this one, visit our Resources page which can help with your video and photo editing needs. While you’re here, check out some related articles below.