How to Do a Hanging Indent in Google Slides?
Hanging indents are necessary for specific types of citations in a Google Slides presentation and also serve as an appealing way to enhance the appearance of text. This article demonstrates two distinct methods for creating hanging indents in Google Slides.
- Author: Shine
- Update: Mar 24, 2025

Ways to Set up a Hanging Indent in Google Slides

Create, edit, and present visually stunning presentations on-the-go with Google Slides.
If you want to incorporate a hanging indent into your Google Slides presentations, adhere to the following steps:
1.Navigate to Google Slides and either create a new presentation or open an existing one.
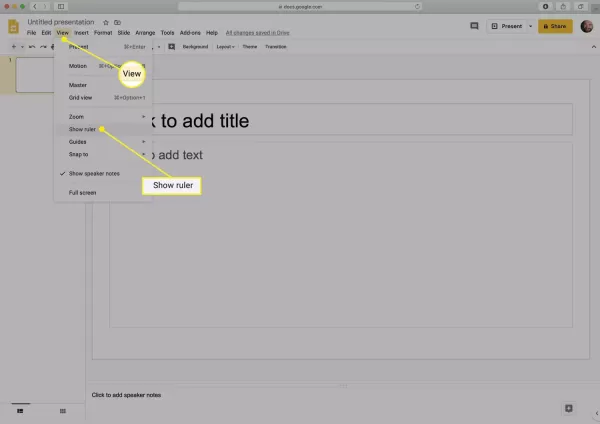
2.Ensure the ruler is visible by selecting View and then clicking on Show ruler.
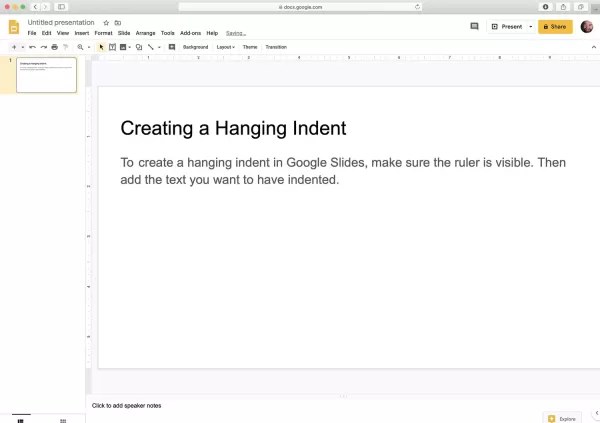
3.If the text you intend to apply the hanging indent to isn't present yet, add it.
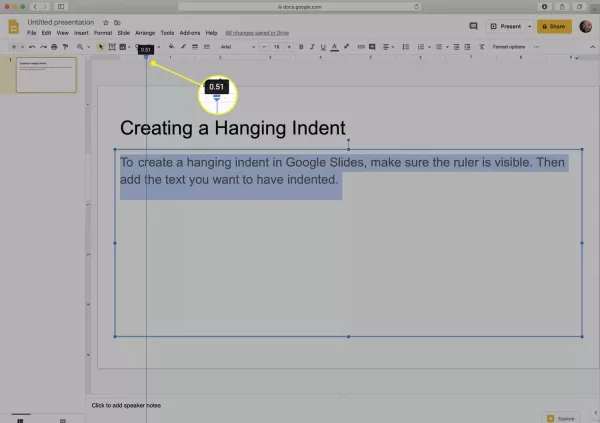
4.Select the text to which you want to apply the hanging indent. In the ruler section, click on the indent control, which resembles a downward - pointing triangle, and then drag it. Release it once you've indented the text to your desired position.
5.Click on the left indent control (it appears as a blue bar located just above the triangle) and then drag it backwards to the location where you would like the first line of the text to begin.
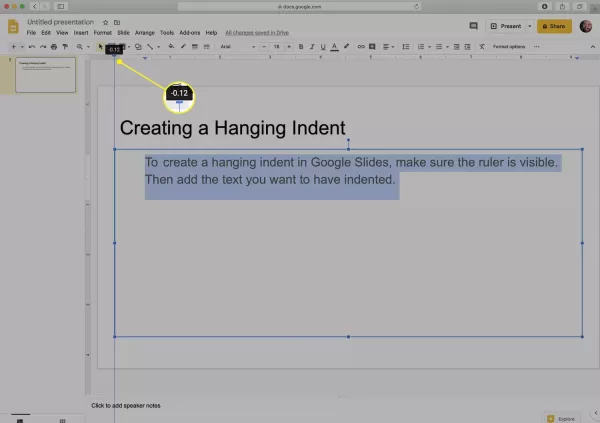
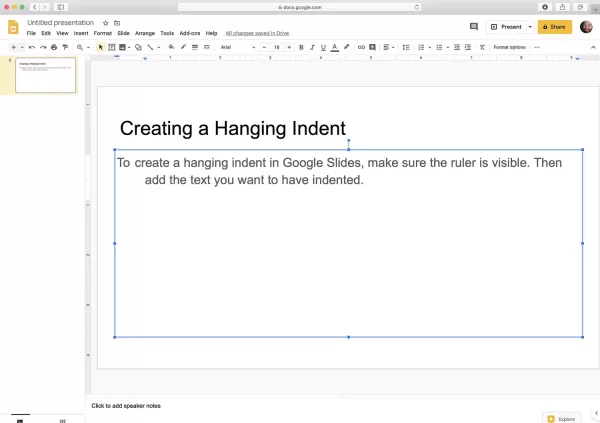
6.When you release your hold on the left indent control, a hanging indent will have been formed.
How to Create a Hanging Indent in Google Slides Using the Keyboard
The most effective method for creating a hanging indent in Google Slides is by following the steps outlined in the previous section. This approach ensures that the indents remain intact regardless of the amount of text you add. Moreover, this type of hanging indent can be applied to multiple sentences or paragraphs.
However, there's an alternative way to create a hanging indent. It's a quick and useful method if you only need to indent a single line. Here's how you can do it:
1.In your Google Slides presentation, position your cursor at the start of the line you wish to indent.
2.Simultaneously press the Return (or Enter) key and the Shift key on your keyboard.
3.Then, press the Tab key to indent the line by a single tab space.
What Is a Hanging Indent?
A hanging indent is a type of text formatting, similar to bullet points. It derives its name from the fact that the initial line of the formatted text features a standard indentation, whereas all subsequent lines are indented to a greater degree than the first line. As a result, the first line appears to "hang" beyond the rest of the text.
Hanging indents are frequently employed in academic citation styles, such as MLA and Chicago style, as well as in bibliographies. Additionally, they can serve as an effective means of creating an attention-grabbing text effect, which helps to highlight specific content. Below is an illustration of a hanging indent taken from a word processing document:
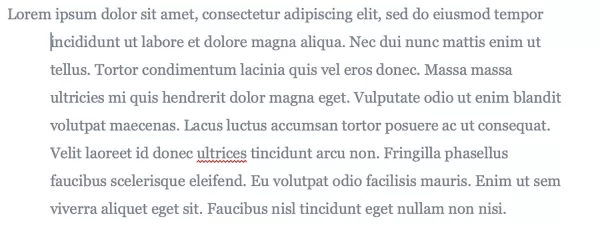
Hanging indents are far more prevalent in text documents generated with applications such as Microsoft Word, Google Docs, or other comparable software than in presentations, for instance, those crafted in Google Slides. Nevertheless, there are certain situations where you might desire to utilize this formatting feature within presentations, either to properly cite sources or to achieve a particular visual impact.