How to change minecraft skin?
Customizing your character with skins and capes in Minecraft Bedrock Edition is a great way to personalize your in-game style. This guide will walk you through how to change skins, utilize the character creator to craft unique looks, and equip capes, whether you prefer classic skins or custom characters.
- Author: Shine
- Update: Feb 24, 2025

How to change your Minecraft skins on mobile
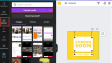
1.Using your mobile device, visit Minecraftskins.com and browse through the millions of available skins for your character in the game.
2.Once you've chosen a skin, go to its page, scroll down, and tap the Download button.

3.A new window will open within your mobile browser and ask if you want to View or Download the image. Select "View".

4.After placing your finger on the image for 2 seconds, you should be prompted to Share, Add to Photos, or Copy. Select "Add to Photos," and the skin file will be saved to your Photo album on your device.

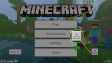
5.Start Minecraft Pocket Edition, and tap the Dressing Room button located at the lower right.

6.Tap the green hanger icon in the left column.

7.Under "Owned Skins," tap the rectangle box, and then select "Choose New Skin."

8.Your photo album will open, allowing you to select the skin file you have just saved.
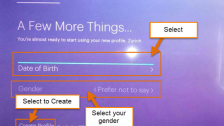
9.You will be prompted to choose between the Slim model (3px arm) on the left or the Classic model (4px arm) on the right.

How to update your Minecraft skins on a PC
1.Ensure that the game is closed when you are in the process of changing your skin. Navigate to MinecraftSkins.com and effortlessly choose from the vast collection of millions of skins that have been shared and uploaded by the members of our community.
2.Once you've made up your mind about the skin you want, click on the Download button located on the right-hand side of the skin's page.

3.Go to https://www.minecraft.net/en-us/msaprofile/mygames/editskin and log in to your Minecraft.net account.
4.After logging in, you will see the page where you can change your skin. Select the correct model: Classic (4px arm) or Slim (3px arm). *If you're unsure which to choose, refer to “Which Minecraft model to choose” at the bottom of the page.

5.Then, move on to the option of “Upload Custom Skin”. Next, click the button labeled “Select File”.

6.A pop-up window will emerge, and then you should go ahead and double-click on the .png image file that you've just downloaded.

7.You are supposed to observe that the skin file has been successfully loaded onto the website. Then, click on the "Upload" button.

Which model of Minecraft should one choose?
To determine the appropriate arm size to use, navigate to the Skin page from which you initially downloaded the skin. The relevant information can be found in the lower left corner of the 3D model Previewer.

If you happened to select the incorrect size for your Minecraft skin, there is absolutely no need for you to feel anxious or concerned! This is a common occurrence that can easily be rectified. All you have to do is simply retrace your steps and go back to the previous stage where you made the selection. Then, upload the skin once more, but this time, make sure to choose the correct model. By doing so, you'll be able to ensure that your skin appears just the way you want it to within the game, and you can continue enjoying your Minecraft experience without any further hindrances related to the skin's model size.