How to add an overlay in CapCut to track a moving body?
When you're trying to capture the attention of as many viewers as possible, you need to use all the CapCut tools available. Overlay layers help to make the video more complex, which can attract more viewers. This can increase your following and fame. Using their range of tools like overlays, CapCut lets you make trending and eye-catching videos. While overlays add a deep creative element to your video in multiple dimensions, doing so is a relatively straightforward process.
- Author: Augenstern
- Update: Oct 28, 2024

The overlay feature and the green screen feature in CapCut serve distinct purposes in video editing.
Here’s a breakdown of their differences:
What is an Overlay?
An overlay is a creative tool that allows users to add layers of visual elements—such as text, images, or videos—on top of existing video footage. This technique is often employed to emphasize key information, inject fun elements, or enhance the overall professionalism of the video. Overlays can be adjusted in terms of size, position, and duration, providing flexibility in how they integrate with the main content.
What is Green Screen?
The green screen feature, on the other hand, functions primarily as a background removal tool. It enables users to eliminate the original background of a video and replace it with a different backdrop of their choice. This feature is particularly useful for creating dynamic scenes where the context or setting needs to change drastically without affecting the subject in the foreground.
Video overlays are a straightforward yet powerful video editing technique that involves layering multiple video clips or images to create a cohesive final product. This method allows for complete coverage of the original footage or can be applied with partial transparency, enabling viewers to see the underlying content.
Types of Video Overlays
Text Overlays: These include subtitles, captions, and narrative enhancements, making them ideal for tutorials, documentaries, and social media content.
Image Overlays: Often used for branding purposes, such as logos and watermarks, image overlays contribute to a professional appearance.
Animated Overlays: Elements like transitions and icons introduce motion and character, enhancing the visual appeal of music videos, advertisements, or intros.
Thematic Overlays: For instance, applying an old film overlay can evoke a vintage aesthetic.
Video overlays offer extensive creative possibilities for editors and content creators, allowing for experimentation and personalization of videos. The following section will provide practical tips and techniques to help video editors and creators engage their audiences effectively.
Advanced Overlay Features
Multiple Overlay Formats: CapCut supports various overlay formats, allowing users to incorporate images, videos, and text seamlessly into their projects. This flexibility enables creative layering that can enhance storytelling in videos.
Position and Duration Adjustment: Users can easily adjust the position and duration of overlays, ensuring that each element appears exactly when and where it is needed in the timeline. This feature is crucial for synchronizing overlays with audio or other video elements.
Layering and Blending Options: CapCut provides sophisticated layering options, enabling users to stack multiple overlays. The blending modes allow for creative effects that can give videos a professional look by adjusting how overlays interact with the background content.
Pre-designed Overlays: The platform includes a vast library of pre-designed overlays and templates. These resources simplify the editing process, allowing users to add professional touches to their videos quickly.
User-Friendly Interface
CapCut is designed with an intuitive interface that appeals to both novices and seasoned editors. The straightforward layout facilitates easy navigation through its features, making it accessible for those new to video editing while still offering depth for experienced users.
Creative Tools and AI Features
AI-Powered Tools: CapCut integrates AI features that automate various editing tasks, such as background removal and auto captions. These tools streamline the editing process and enhance productivity.
Customization Options: Users can customize overlays extensively, adjusting colors, animations, and effects to fit their unique style or branding needs.
Collaboration Features: CapCut supports collaborative editing, allowing teams to work together on projects in real-time. This feature is particularly beneficial for content creators working in groups.
How to use video overlays in CapCut
Video editing is easier with the powerful and user-friendly video overlay options for free in CapCut.
Here's a step-by-step tutorial on utilizing CapCut to add video overlays successfully:
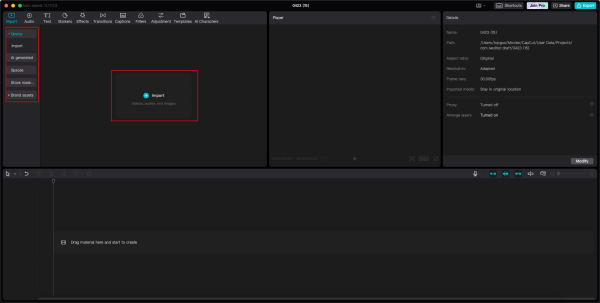
Step1
Import your video
To begin using CapCut, start by downloading and installing the application. After installation, you can jump right into your project. On the editing interface, simply click the Import button to upload your files, or use the drag-and-drop feature for a faster method. CapCut also offers AI generation, a collection of stock materials, and cloud services, enabling users to fully leverage its capabilities. You can maximize your storage with CapCut's cloud options or take advantage of the resources available directly within the editor.
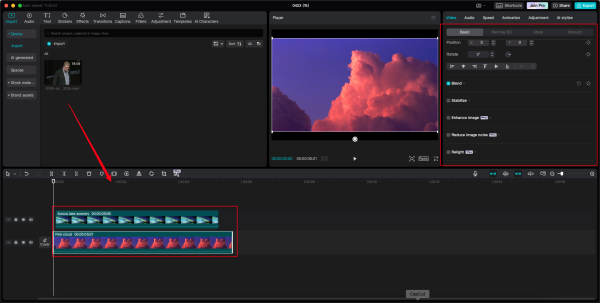
Step2
Add the overlay and enhance
It's time to overlay your video. To do this, simply drag and drop your materials onto the timeline. Next, explore the available resources such as text, filters, effects, animations, or video templates to find the best combination for your project. However, a true professional goes beyond this initial step. Shift your focus to the editing features located on the right side of the interface. Here, CapCut enables users to upscale, rotate, stabilize, and reframe their videos effortlessly. Additionally, be sure to utilize the image enhancer and relight features, which will refine the quality and elevate your video’s overall presentation.
Step3
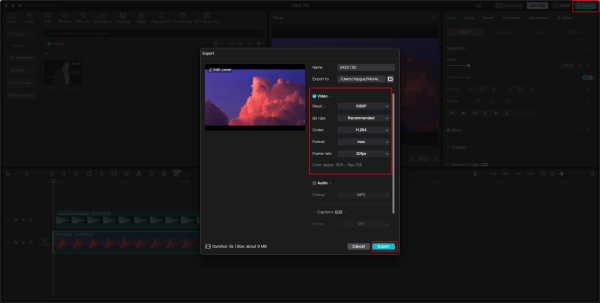
Export and share
You can adjust the settings to enhance the visual appeal of your video. Selecting the appropriate resolution, frame rate, and format is crucial for increasing the chances of your video going viral.
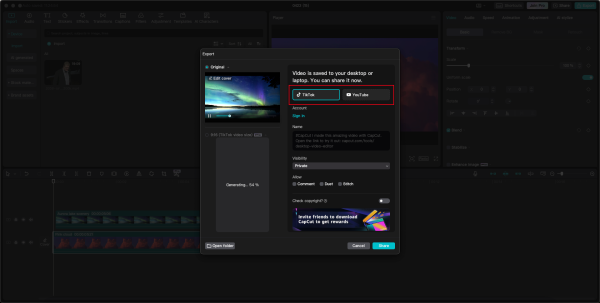
CapCut seamlessly integrates with social media platforms, allowing you to effortlessly share your creations on TikTok and YouTube with just a click.
How to use video overlays in CapCut: mobile phone version?
To begin, install the app on your iOS or Android device.
Step1
Import your video
Click "New Project" to import your main video or live photos into the editor.
Step2
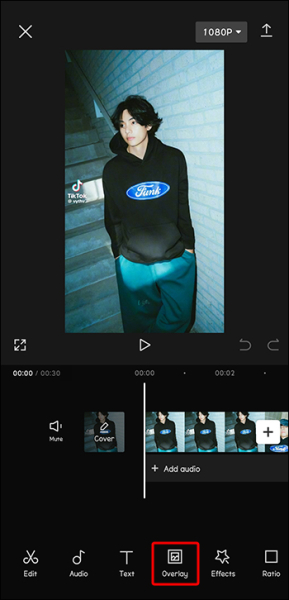
Add the overlay
Once you have uploaded the video, select the overlay option beneath and incorporate overlays from your gallery or available stock videos.
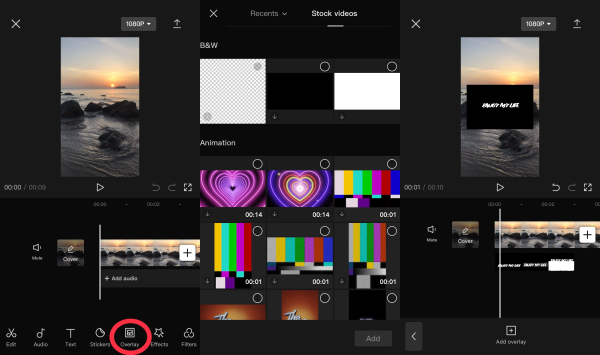
Stock videos offer various overlays, such as B&W, animation, and cut-out text.
Step3
Customize, enhance & download
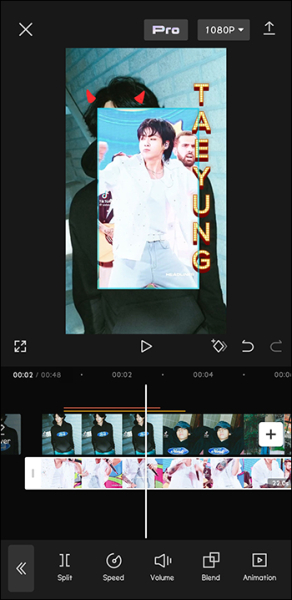
Both your primary and overlay videos will appear in the timeline. You can rearrange them by simply dragging and dropping to achieve your preferred order.If the overlay video exceeds your desired length, you can shorten it by dragging its edges.Additionally, you can modify settings such as "filters," "adjustments," "blending mode," and "position." You have the option to make the overlay video transparent or semi-transparent, allowing it to blend with the main video without fully obscuring it.
Pro Tips for Practical Video Overlay Usage on CapCut
Match Overlays to Your Video's Theme
When selecting overlays, ensure they align with your video's theme, style, and mood. For instance, using a snow overlay can effectively create a winter ambiance, enhancing the overall visual storytelling of your video.
Convey Information or Emotions
Video overlays serve as powerful tools for conveying information or enhancing emotional impact. Text overlays can provide context, while emotional overlays—like hearts or stars—can evoke specific feelings in your audience. This strategic use of overlays can significantly enhance viewer engagement.
Avoid Overuse and Maintain Subtlety
While overlays can enrich your video, it's crucial to avoid excessive use. Overloading the screen with too many overlays can clutter the visual space and distract viewers. Instead, apply overlays strategically to highlight key moments or messages, ensuring clarity and focus.
What Makes CapCut the Premier Video Overlay Editor
CapCut stands out not just for its overlay capabilities but also for its comprehensive suite of video editing tools:
Restyling Effects: The platform offers a variety of text overlays, filters, and effects that enhance visual quality. You can also incorporate sound effects and music to elevate your content further.
Smart Features: CapCut includes AI-driven features like speech-to-text for automatic captioning and text-to-speech voiceovers that add a lively touch to your videos. Additionally, the ability to remove video backgrounds seamlessly allows for creative backdrop changes without visible gaps.
Cloud Storage: With 1 GB of free cloud storage, CapCut alleviates concerns about device storage limitations. Users can easily upgrade their storage plans as needed, ensuring that original and edited videos are securely stored and accessible anytime.
CapCut's combination of versatility, user-friendly interface, and advanced features makes it an excellent choice for anyone looking to enhance their video editing experience with practical overlay usage.
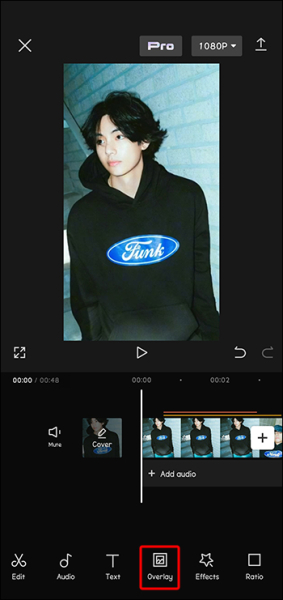
How to Utilize CapCut Overlays?
When you want to add extra pizazz to your video, but you don’t want to change the original content, the overlay feature is the perfect tool. These steps will walk you through the process to add an overlay to a CapCut video.
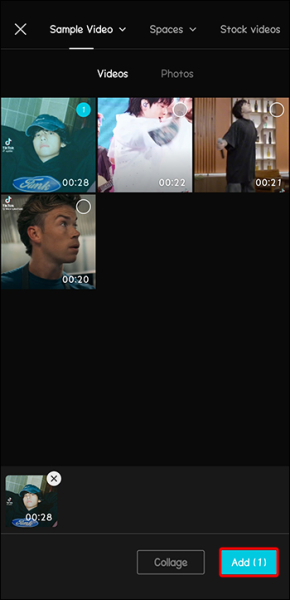
1.Open the CapCut video that you want to edit.
2.Tap “Add” to begin a new project that will hold your overlays.
3.Select the “Overlay” feature from the bottom menu.
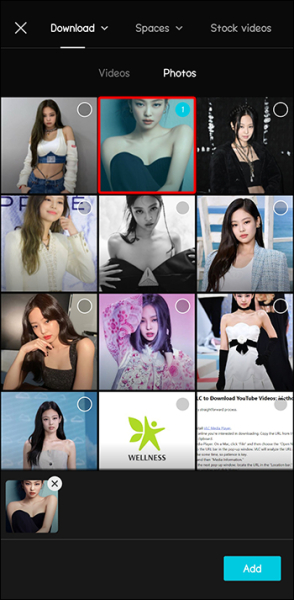
4.Scroll to find the overlay that you want to use.
5.Click “Add” to use this overlay.
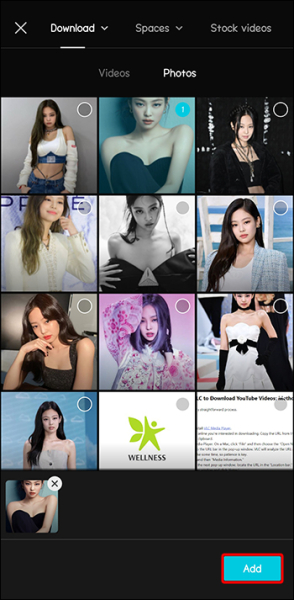
6.Adjust the overlay size and position relative to the video by dragging it.
7.Adjust it until you are happy with your overlay design.
How to Add Text Overlays?
If you want to add some text to your video that will display like an overlay, the process to add it is also simple. And you don’t actually need to access the overlay menu to do so.
1.Open the video to which you want to add text in CapCut.
2.Choose the “text” option to begin to add text to your video.
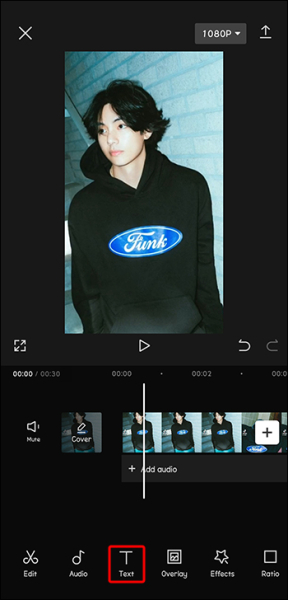
3.Type the text that you want as an overlay into the designated input box.
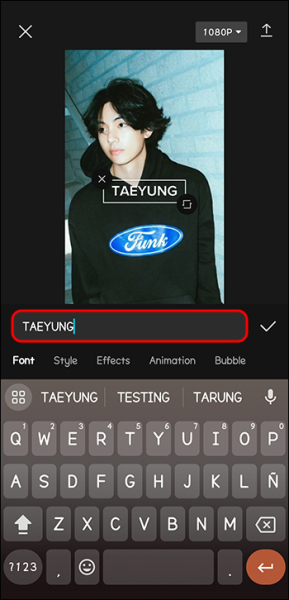
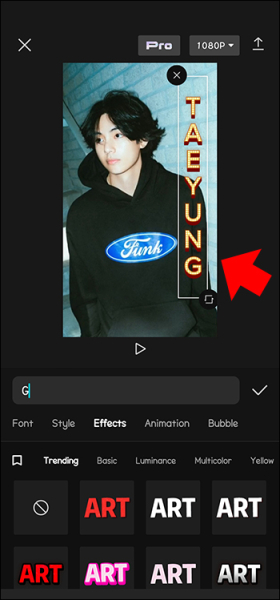
4.Adjust the color, size, and font if necessary.
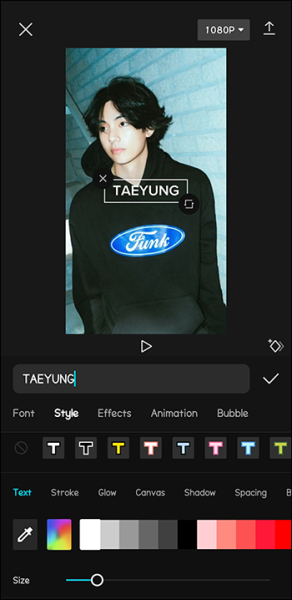
5.Add animation or bubble effects if you desire.

6.Drag the text around to your desired position.
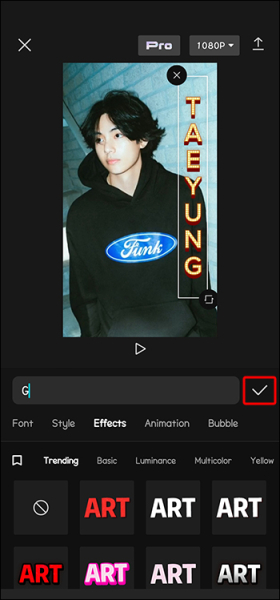
7.Tap the “Check” when you are finished to save.
When you embellish videos with text, the text strings are automatically formatted as an overlay. So added text doesn’t need to be edited through the overlay menu.
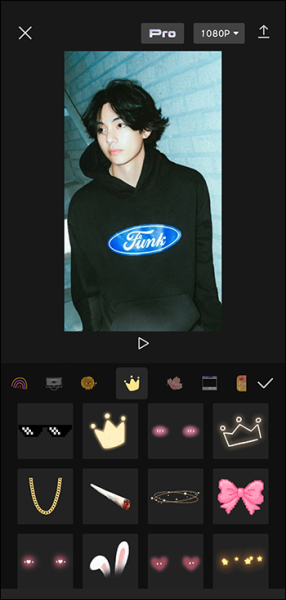
How to Add Sticker Overlays?
Stickers are a popular way to dress up your CapCut videos. They make videos really pop with fun. Fortunately, CapCut has a library of stickers from which to choose.
1.With your video open, select “Sticker” from the menu.
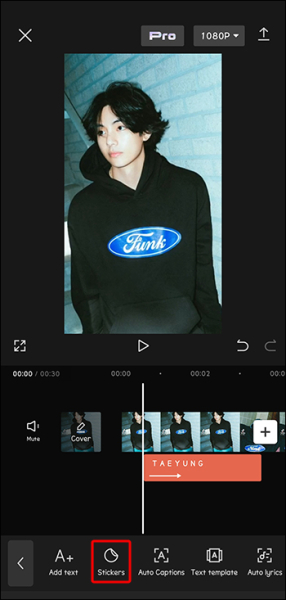
2.Browse for the perfect sticker for your project.
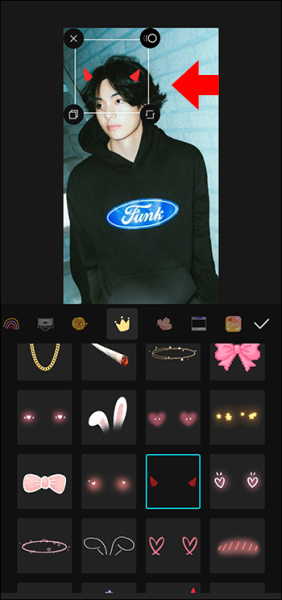
3.Move the sticker around to position it. You can resize it as well.
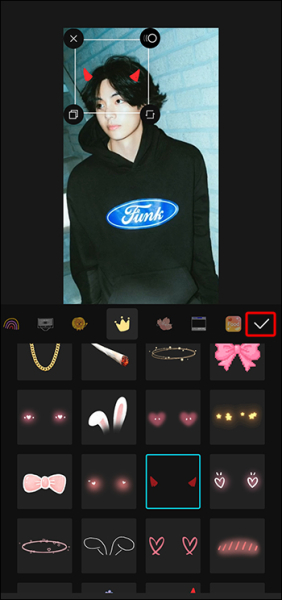
4.Tap the “Check” to save.
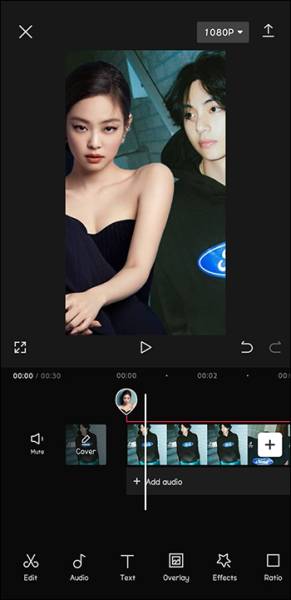
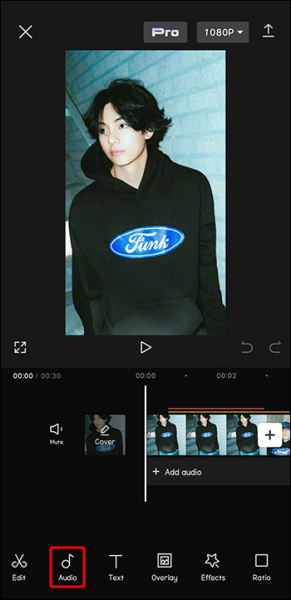
How to Add Audio Overlays?
Videos with catchy music or sound clips are much more engaging and memorable. If your video doesn’t contain any audio, or you feel it could benefit from more, you can overlay audio tracks on top of the images or an existing audio track to enhance and improve its appearance.
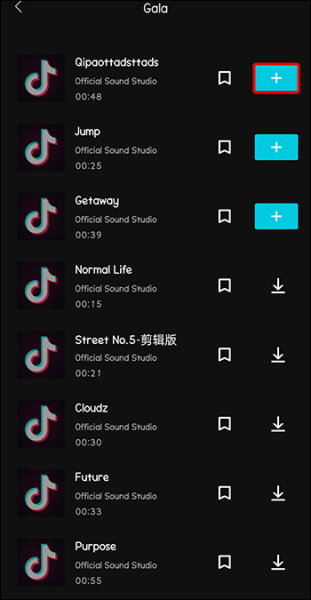
1.Open your video in CapCut and choose the menu option “Audio.”
2.Scroll through the library to select an audio overlay.
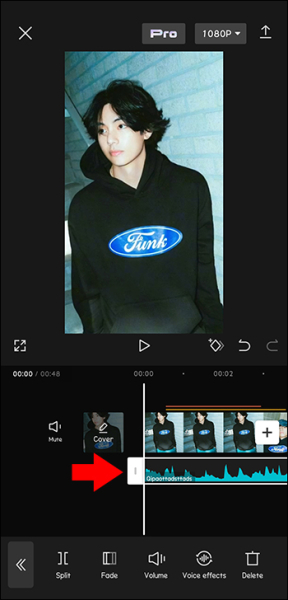
3.Adjust the position of the audio if necessary.
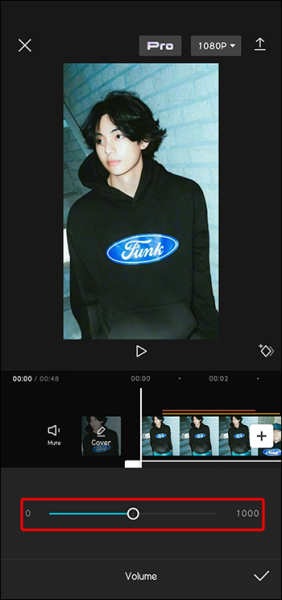
4.Adjust the volume control of the audio.
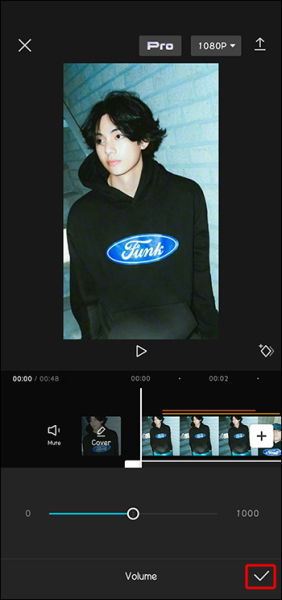
5.When you’re done, tap the “Checkmark” to save your work.
How to Add Video Overlays?
While it’s common knowledge that you can add effects to your video, you might be surprised to find out that you can overlay another video on top of videos as well. This layered effect adds a wonderful complexity to your finished project.
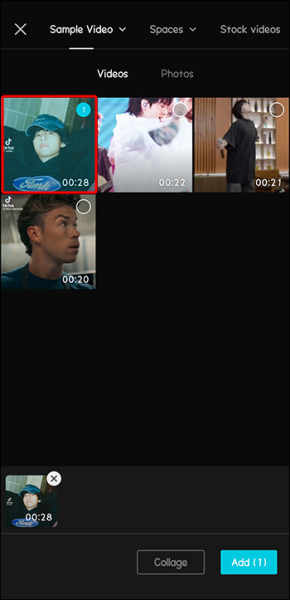
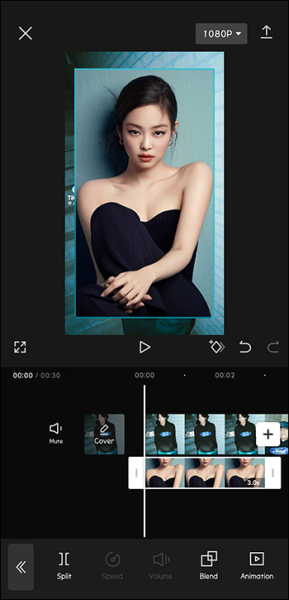
1.Choose “Overlay” from the bottom menu.
2.Click the “Add overlay” icon to select the second video you wish to use.
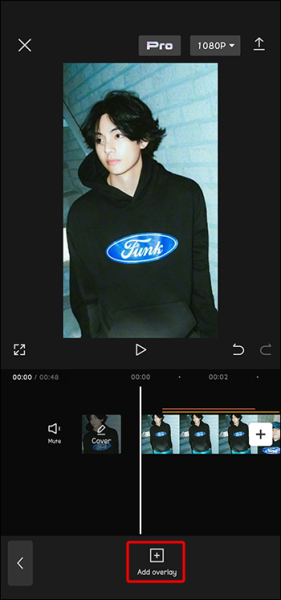
3.Both videos will now be on your screen. You can drag and zoom them to adjust the project look.
Why use CapCat? What are the attractive features of CapCut?
CapCut is not merely an overlay application; it serves as a comprehensive suite of functionalities that transform your video projects into stunning visual experiences. With capabilities ranging from multi-layer editing to dynamic animation effects, this app equips users with all the tools necessary to craft videos that engage and entertain. Below are some notable features that establish CapCut as the premier choice for realizing your creative ideas.
Multi-Layer Editing
CapCut allows users to work with multiple layers, enabling intricate editing that can combine various clips seamlessly. This feature supports advanced editing techniques, providing flexibility in how footage is arranged and presented.
Animation Effects
The app includes a wide array of animation options, allowing users to add movement and flair to their videos. This feature enhances storytelling by making visual elements more engaging and lively.
Background Removal
CapCut's automatic background removal tool eliminates the need for green screens, making it easy to isolate subjects from their backgrounds. This functionality is particularly useful for creating professional-looking videos without complex setups.
AI-Powered Tools
The integration of AI tools, such as auto captions and voice enhancement, streamlines the editing process. Auto captions generate text from spoken audio, while voice enhancement improves audio quality by reducing background noise.
Smooth Slow Motion
This feature allows users to create slow-motion effects that are smooth and visually appealing. CapCut employs AI technology to ensure that slow-motion clips maintain high quality and fluidity.
Chroma Keying
CapCut supports chroma keying, enabling users to replace backgrounds easily. This feature is essential for creating dynamic scenes where subjects can be placed in various environments.
Extensive Effects Library
Users have access to thousands of effects, transitions, and filters that can be applied to enhance the visual appeal of their videos. This library includes both video effects and body effects, providing versatility in how videos are styled.
User-Friendly Interface
CapCut's intuitive interface simplifies the editing process, making it accessible for both beginners and experienced editors. The timeline feature allows for easy manipulation of clips, audio tracks, and effects.
Steps to Overlay Images in iMovie
Step 1: Launch iMovie
Open the iMovie app and either continue from a previous project or create a new one.
Step 2: Add Video and Select Image
Tap the '+' icon to add a video from your library, then choose the image you want to overlay.
Step 3: Adjust Image Settings
Select the image on the timeline to access options for adjusting its size, position, and duration. Customize these settings to fit your video perfectly.
Step 4: Timing Your Overlay
To have your image appear at a specific moment, simply drag and resize the overlay on the timeline so it shows exactly when and where you want it in your video.
Step 5: Export Your Video
Once you're satisfied with your edits, export the finished video to your device or share it online.