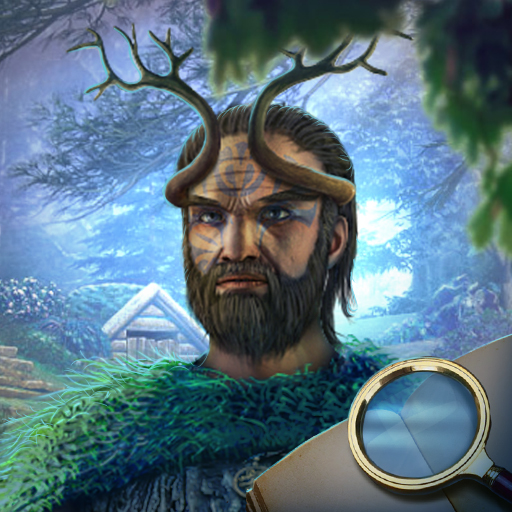
Lost Lands 9 - Cooperative puzzle adventure
Embark on an epic quest featuring hidden objects, engaging mini-games, and a captivating storyline with friends.
- 1.0.3.1379.2035 Version
- 2.5 Score
- 540K+ Downloads
- In-game purchases License
- 7+ Content Rating


An unidentified creature roams the valleys, wreaking havoc wherever it goes. Only a formidable group of friends can confront this menace.
“Lost Lands: Stories of the First Brotherhood” is an adventure game in the Hidden Objects genre, featuring numerous mini-games and puzzles, unforgettable characters, and intricate quests.
The inhabitants of the valleys are alarmed by the emergence of a shadowy villain. Reports of incidents have been received from various sources. All eyewitnesses describe the same swift beast, so fast that it eludes detection. The brightest student from the Academy of Magic aims to tackle this issue. Alongside a chance companion, he follows the creature's trail to assist those afflicted in the Lost Lands. However, the duo must reevaluate their approach and adapt their strategies after encountering their adversary. Their journey fosters a strong bond, leading to the birth of the "First Brotherhood" amidst trials.
FEATURES
- Track down the mysterious force causing turmoil in the region and uncover its origins.
- Experience the narrative from dual perspectives by assuming the roles of different characters.
- Merge the abilities of the main protagonists to collaboratively solve numerous puzzles and vanquish evil.
- Explore new areas while reliving fond memories by revisiting older locations.
- Learn about the history of the Lost Lands centuries before Susan the Warrior made her appearance.
Plot
Lost Lands 9: Stories of the First Brotherhood – The game walkthrough begins with what a great morning to skip school, thought young inventor Folnur. A month ago, while disappearing in a canyon, he discovered a small cave with wall paintings. They spoke of crystals with different physical properties. Although he disliked learning in general, he loved physics. Folnur decided to develop a device using these crystals for the school craft fair. And on this day, the inventor wanted to conduct his first test. You will also be introduced to a story where an unknown entity prowls the valleys, destroying everything in its path. And only a strong team of friends is able to cope with it. The valleys are alarmed by the appearance of a mysterious villain. Incidents are reported from different places. All witnesses claim about the same beast, which is very fast and it is impossible to see. To solve the situation takes the best student of the academy of magic. Together with his partner, he follows the trail of the beast and helps the affected residents. However, meeting with the enemy makes the friends look at the situation differently and change their plans.
TIPS
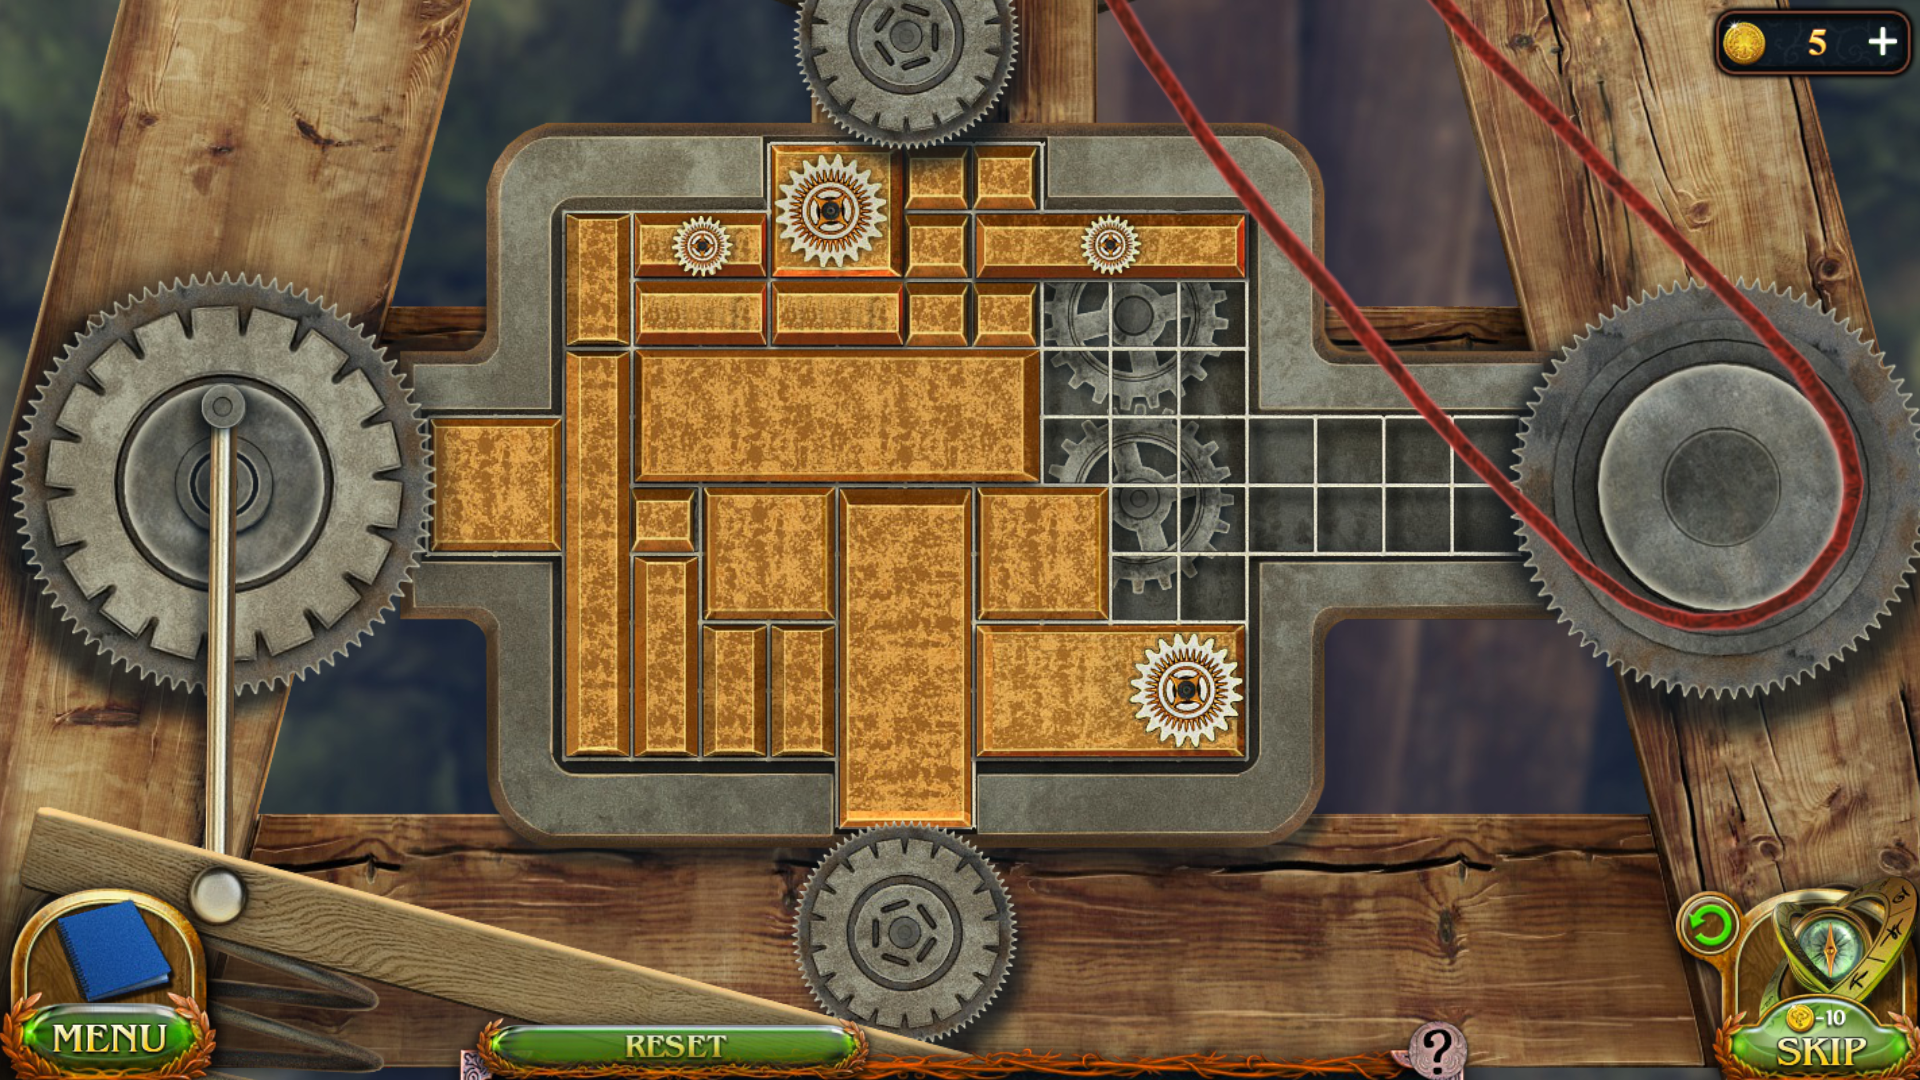
Chapter 1: Unchildlike mischief
While young Folnur was skipping his school in abandoned dungeons, he found and opened an ancient sarcophagus. This is how the adventure began.

Take IRON FLOWER (A).
Take STICK (B).
Use STICK on (C).
Take SCREWDRIVER SHAFT (D).
Use IRON FLOWER on (E).
Go right.

Take ASCENDER (F).
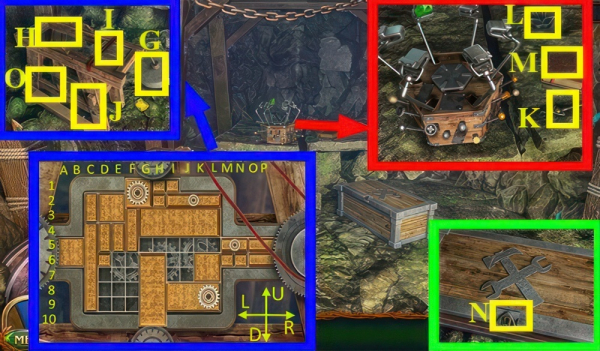
Take WOODEN HONEYCOMB (G).
Take WOODEN HONEYCOMB (H).
Take WOODEN HONEYCOMB (J).
Use WOODEN HONEYCOMB on (I) and complete puzzle and earn ROLL OF ROPE and SHELTER KEY.

Use ROLL OF ROPE on (K).
Use ASCENDER on (L).
Go down.

Take TRAVELER’S KEY (M).
Press (N).
Press (Q) and complete puzzle and get SCREWDRIVER HANDLE.
Use SCREWDRIVER SHAFT on (O) and earn a SCREWDRIVER.
Go back 2 times.

Use TRAVELER’S KEY on (P) and earn FLINT.
Go left.
Use SCREWDRIVER on (R) and earn LION MASK.

Take IRON FLOWER (S).
Use LION MASK on (T).
Get BARN KEY.
Use BARN KEY on (U) and play puzzle to receive PLUMBING PARTS.

Use the PLUMBING PARTS on (V) and complete puzzle.
Walkthrough: (A) 12-4, 15-17, 21-12, 9-21, 6-15, 8-6, 7-5, 15-7, 14-8, 13-9.
19-13, 20-14, 21-15, 22-19, 23-16, 4-10, 17-11.
Walkthrough: (B) 10-12, 3-11, 2-10, 15-2, 21-4, 22-3, 20-22, 19-9, 13-15.
22-13, 23-19, 24-20, 17-21, 11-24, 5-22, 24-5, 12-24, 10-23, 9-17, 15-11.
21-10, 22-9, 23-15, 17-21, 11-22, 10-12, 9-17, 15-11, 21-10, 22-9.
Walkthrough: (C) 9-3, 15-17, 14-9, 13-16, 21-13, 16-21, 17-15, 18-16, 11-18.
10-11, 9-10, 15-9, 16-14, 11-15, 5-16, 10-5, 9-17, 15-9, 16-15.

Use SCREWDRIVER on (D) to get SHELTER KEY.
Use IRON FLOWER on (E).
Go right, then go down.
Use SHELTER KEY and SHELTER KEY on (F).
Go left.
Drag (G) to (H).
Drag (I) to (J).
Take the TOOLSET KEY (K).
Take the IRON FLOWER (L).
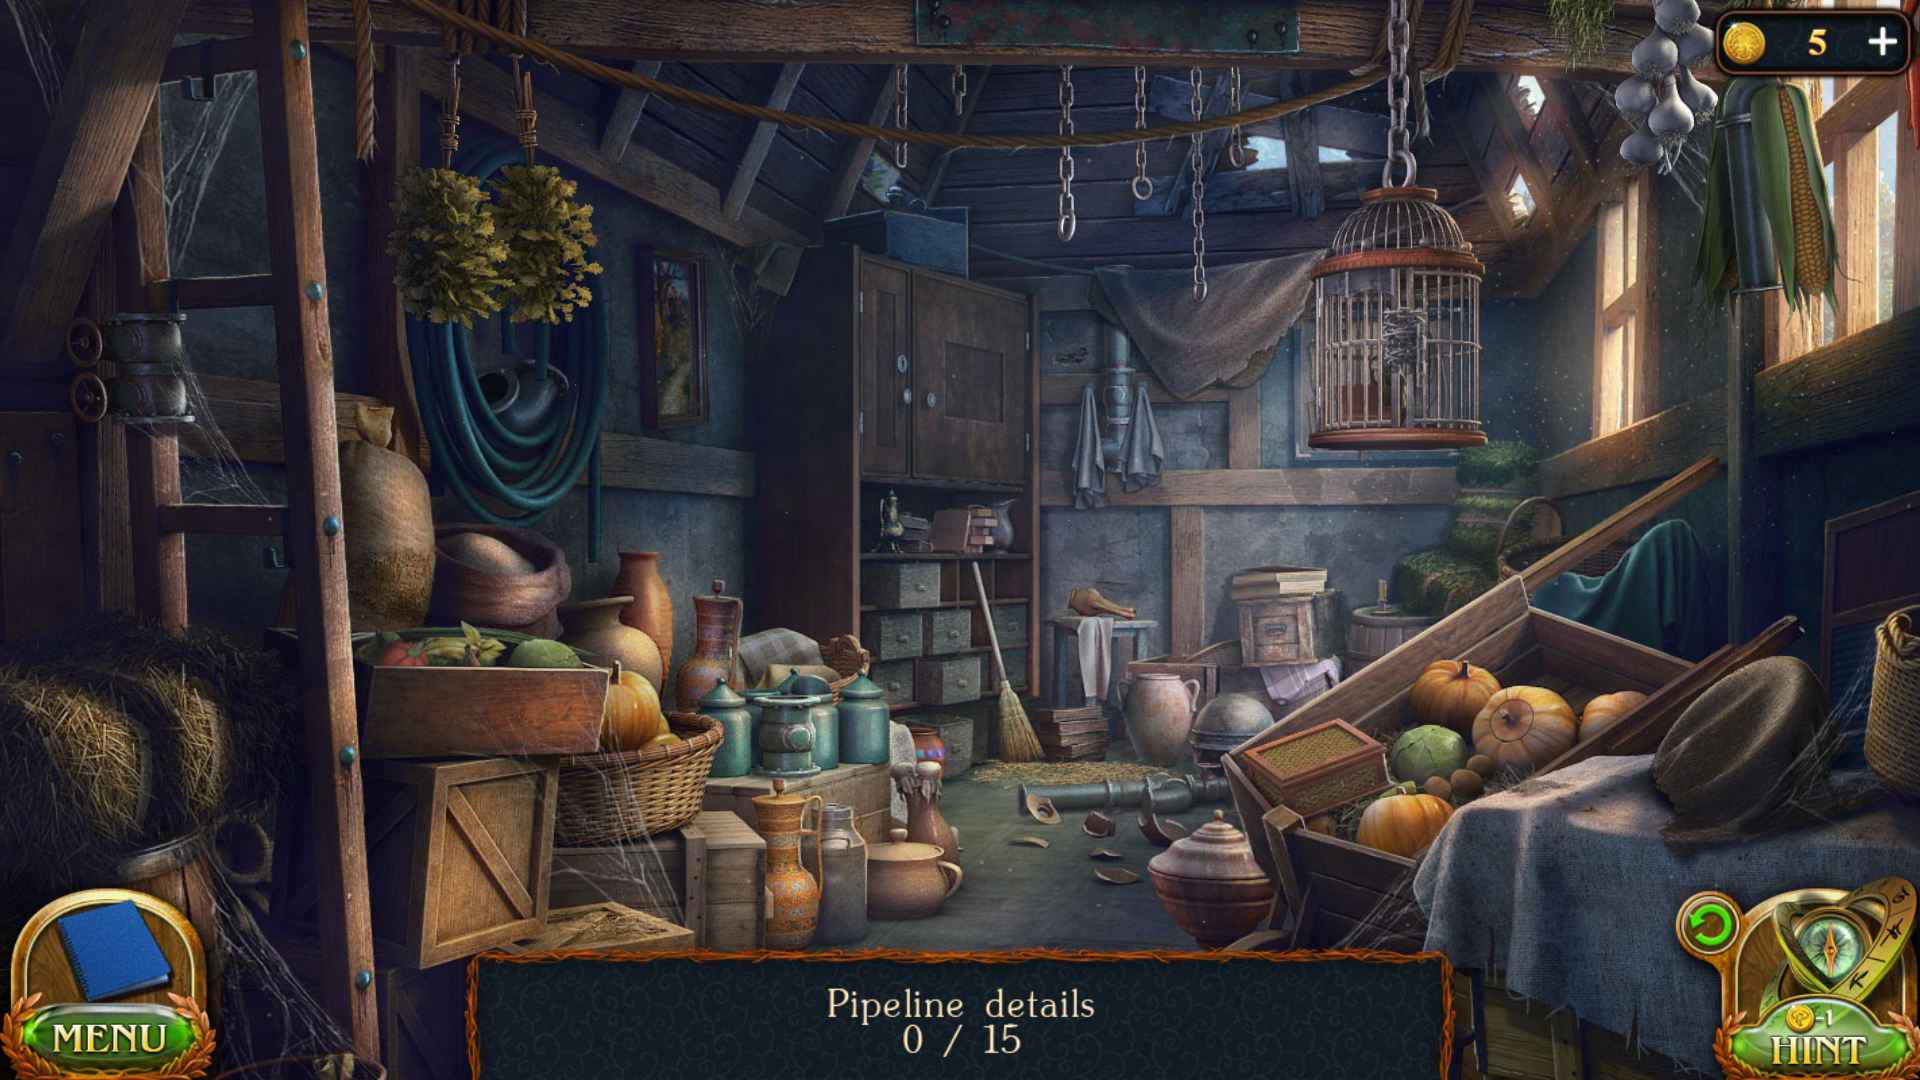
Press (M) and look for hints.
Use TOOLSET KEY on (N) and take GEAR TRANSMITTER and HAMMER.
Use GEAR TRANSMITTER on (O).
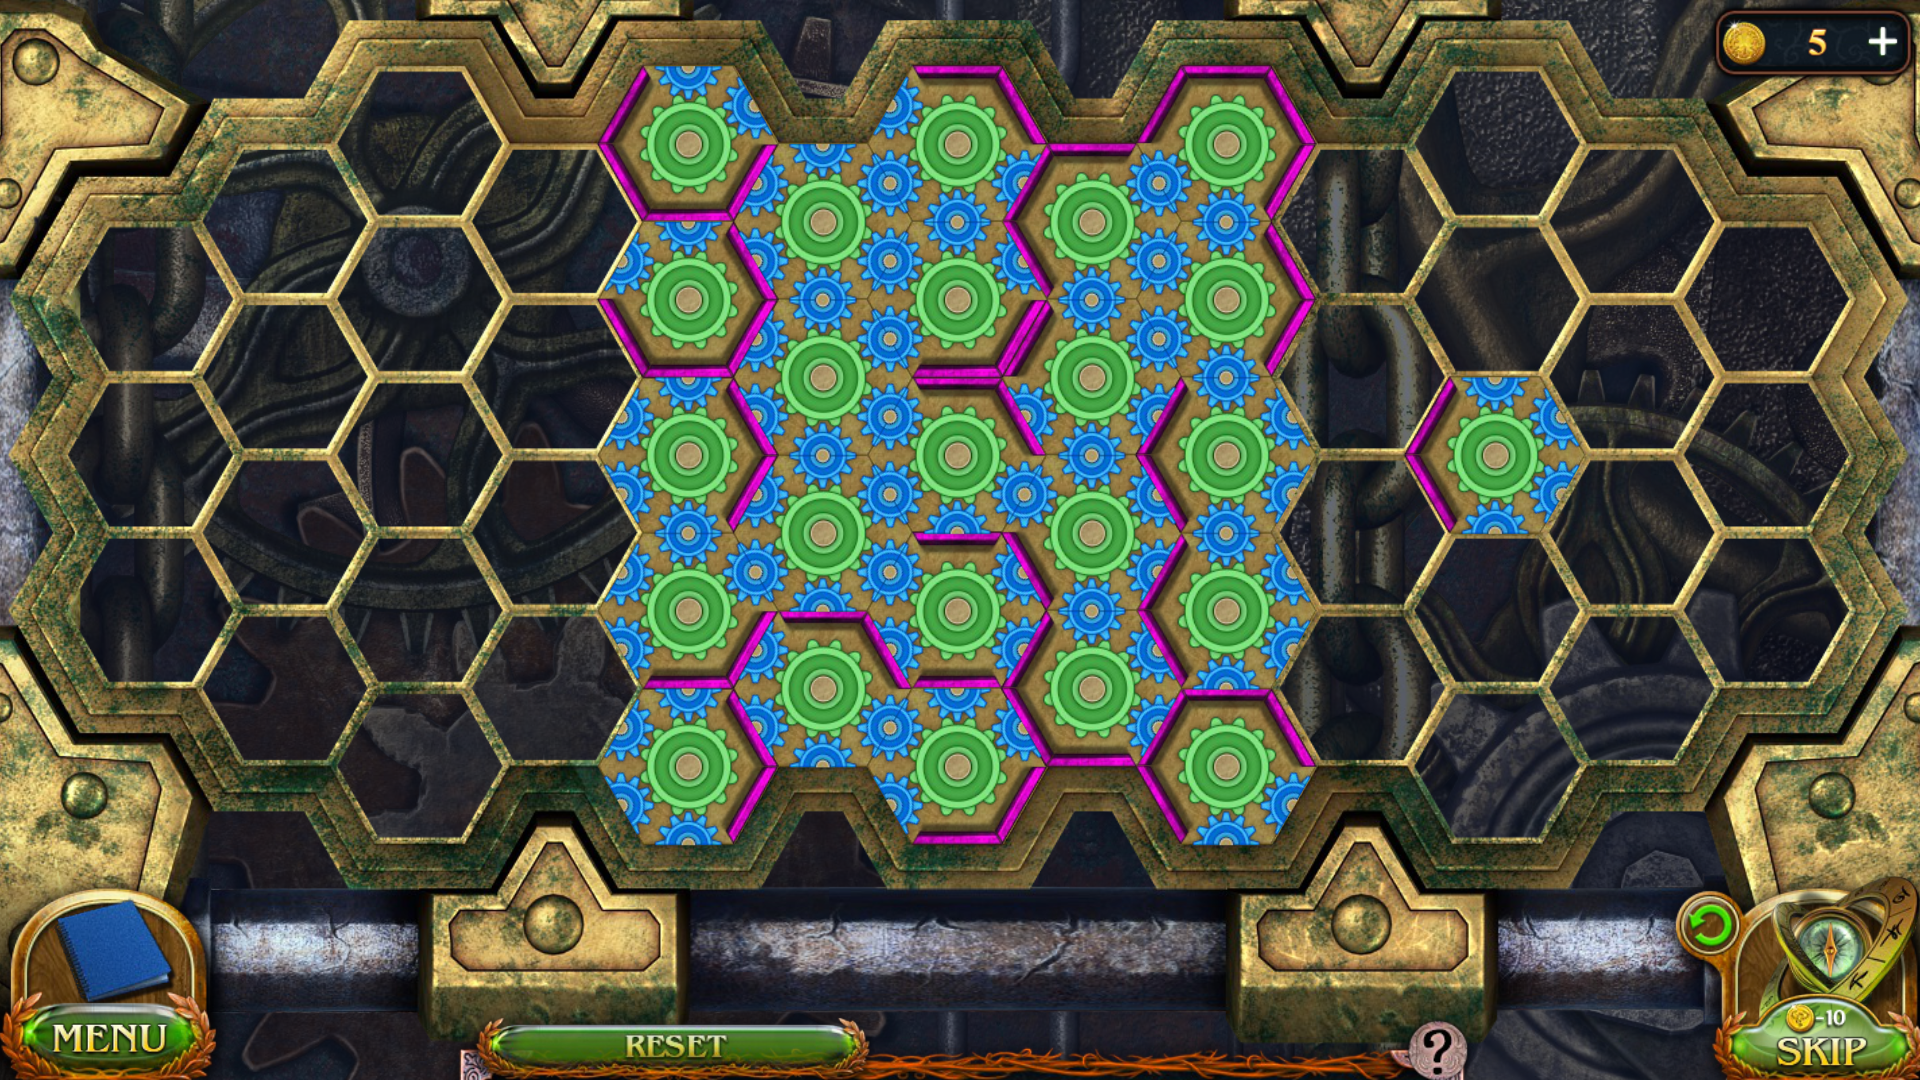
Press (O) and complete puzzle.
Walkthrough: F3-D4, D6-R2, F6-U1, F5-R3, I5-D2, E4-D4, D4-D4, D2-D4, C2-R2.
E2-D2, E4-R1, F4-D1, G3-D1, F1-D1, F2-L3, H1-L2, F1-D3, F4-L2, D4-D1, H2-L3.
E2-D3, I1-L3, F1-D3, I2-L3.
F2-U1, G4-U2, F4-R4, J4-D3, E5-U1, E4-R5, J4-D2, D5-U1, D4-R5, I4-D2, F5-U1.
F4-R6, D6- U2, D4-R1, E4-U2, E8-U4, E4-R6, D8-U4, D4-R6, C4-R2, C2-D6, A5-R2.
C5-U3, C8-U3, C5-L2, E4-L2, F7-L2, J4-L6, I6-U1, I5-L4, E5-D1, E6-L1, G6-U2.
G4-L2, I7-L2, G7-D2, G9-L2, J7- L3, G7-D2, G9-L1, J6-U2, J4-L1, K6-L4, G6-U2.
K4-D2, L4-D2, M5-L4, I5-D2, I7-L2, G7-D3, K6-L4, G6-D2, L6-L4, H6-D2, O5-L6.
I5-D2, I7-L2, M6-L3, J6-U2, N6-L3, K6-U2, O6-L8, I8- U3, I5-R4.
Go back.

Use HAMMER on (P) and earn NUGGETS 1/4.
Go back.
Use HAMMER on (R) and earn NUGGETS 2/4.
Go back.

Use the IRON FLOWER on (S) and earn NUGGETS 3/4.
Go right, then go down, then go left.
Use HAMMER on (T) and earn NUGGETS 4/4.
Use NUGGETS 4/4 on (U).
Press (V).
Go back 3 times.

Drag (W) to (X).
Go right.
Take the BRUSHWOOD (Y).
Go back.
Use BRUSHWOOD and FLINT on (Z).
Go right, then go down.
Take FLASK WITH ALCOHOL (A).
Go back 2 times.
Use FLASK WITH ALCOHOL and FLINT on (Z).
Drag (B) to (X) and get FAT.
Go right, then go down, then go left.

Use FAT on (B) and press (B).
Drag (C) to (D) and get CRYSTALS.
Press (E).
Use CRYSTALS on (E).

Use HAMMER on (F).
Complete puzzle.
Walkthrough: A-U2, E-D1, G-U1, F-D1, G-U1, F-D1, G-U1, F-D1, E-U1, A-D1.
C-U1, D-U1, B-U1, D-U1, A-U3, D-U2, C-U1, G-U1, B-U2, G-U2, C-D2, A-U1.
E-D1, C-U1, B- U1, C-U2, B-U1, C-U1, A-D2, E-U1, F-U1, C-D1.
Go right.

Press (H) and take CRYSTAL CANDLE and PRY BAR.
Press (I).
Take the CRYSTAL CANDLE (J).
Go back 3 times.

Use PRY BAR on (K) and take BOARD.
Go back 2 times.
Take the CAULDRON (L).
Use CAULDRON on (M).
Drag (N) to (Q) to get CAULDRON OF WATER.
Go right, then go down, then go left, then go right.

Use BOARD on (O) Take ANCIENT SEAL and BOARD.
Use BOARD on (P) and earn BOARD.
Go back 3 times.

Take NAILS (R).
Take BOARDS (S).
Use BOARDS, NAILS and HAMMER on (T) to earn SELF-MADE BRIDGE.
Go left, then go right.

Use SELF-MADE BRIDGE on (U).
Use CAULDRON WITH WATER on (V) to get CAULDRON.
Use CAULDRON on (W) to receive CAULDRON WITH BLACK OIL.
Use CAULDRON WITH BLACK OIL and FLINT on (X).
To be continued
- Version1.0.3.1379.2035
- UpdateMay 29, 2025
- DeveloperFIVE-BN GAMES
- CategoryAction & Adventure
- Requires AndroidAndroid 5.0+
- Downloads540K+
- Package Namecom.fivebn.ll9.f2p
- Signature8f2da9179f5d4154ed67ea3a903d8c57
- Available on
- ReportFlag as inappropriate


Engaging storyline with backstory
Stunning graphics and artwork
No ads, completely free to play
Variety in puzzle difficulty levels
Ability to replay favorite chapters
Adequate hints available through video rewards
Unique mini-games with different mechanics
Immersive gameplay that helps reduce stress
Increasingly challenging puzzles can be frustrating
Some puzzles lack clear instructions
Limitation on item collection until needed disrupts flow
Pay-to-play model for hints can feel restrictive
Technical issues like glitches affect gameplay experience
Darker direction may not appeal to all fans
Linear storytelling reduces exploration and multitasking opportunities
Shorter overall gameplay compared to earlier installments